
Uploading new Media Assets
Generally, the media you work with will already be managed in Promomats as a Component and can be imported directly from Promomats to your document using the Media Browser.
Learn more about how to do this here: Media Assets and the Media Library
If the media you need to use is not already available to you via the Media Assets and the Media Library then you can upload these media assets such as images, video and audio files directly via Activator.
Upload media assets by drag and drop
Activator supports to simply drag and drop media assets.
Step 1: Open your Slide in the Editor
Step 2: Drag and drop the media asset anywhere on the Canvas
Step 3: You will now be prompted with a popup that requires you to decided if the asset should be added to as a
Shared asset (it will be added to the design System and available across all content in the SR)
Local asset (it will be added to the specific Slide for the Presentation)
Vault asset (it will be created as a Vault asset and will be available to import globally from Vault on all content)
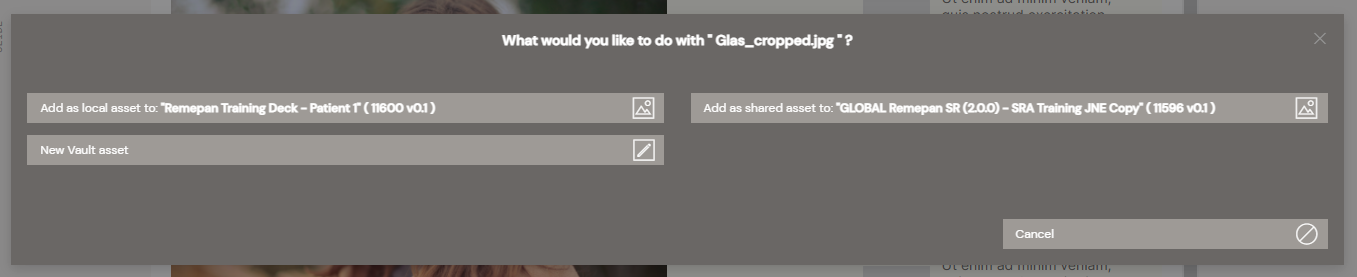
Step 4: Once filled out, simply click the “Create”-button and you are now done with uploading a whole new asset to use in your content.
Upload media assets from the Editor
Another option is to add new assets from the Editor directly.
Step 1: Open up the Slide for which you’d like to add an asset and go to "edit mode".
Step 2: Select:
Content
Media
Upload
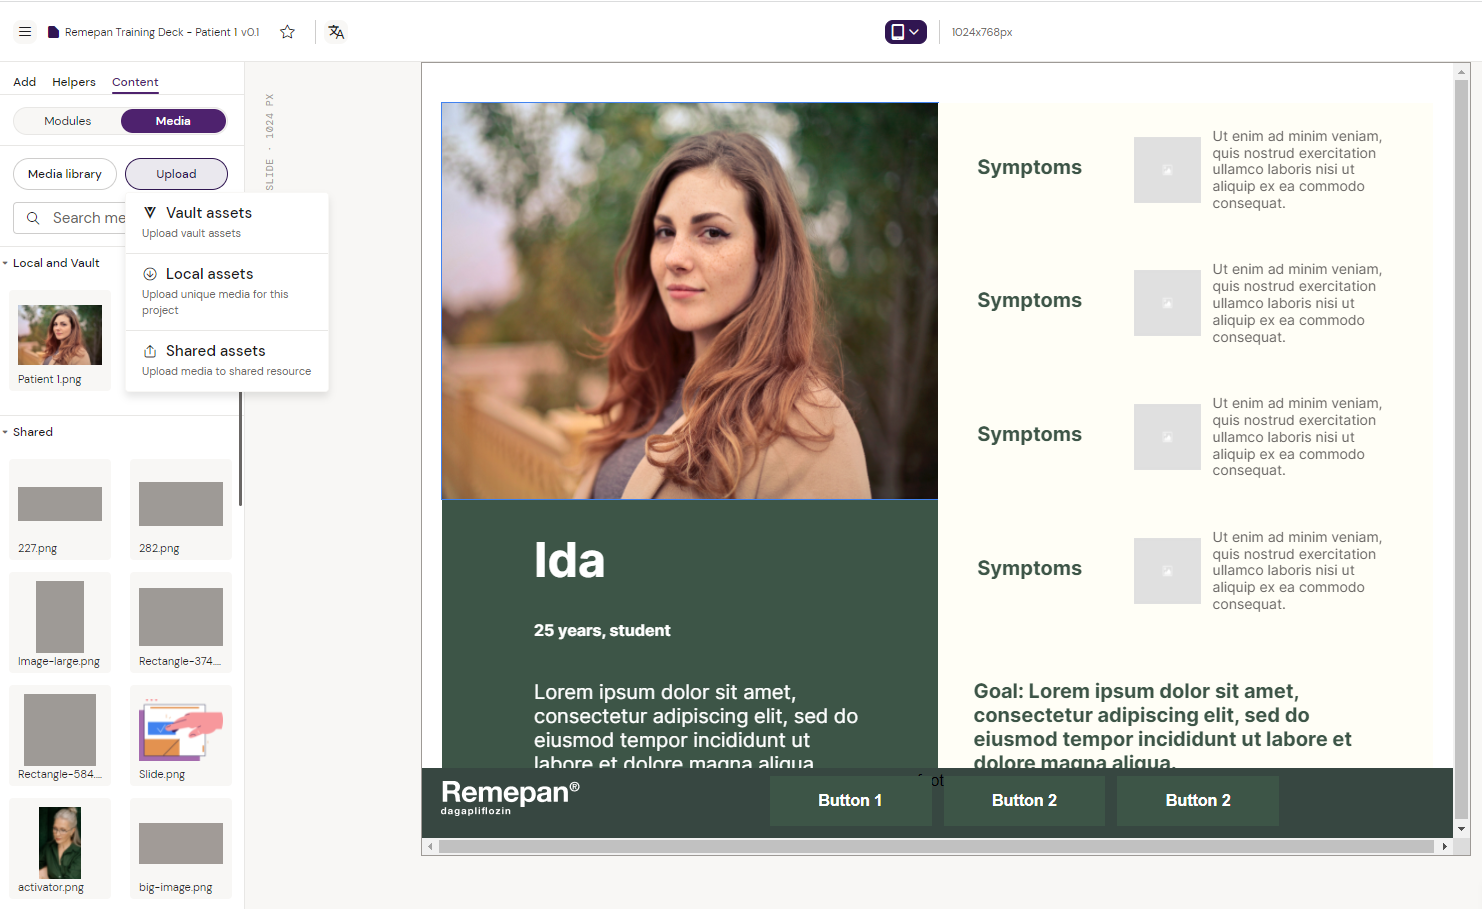
Step 4: Upload an image from your local desktop as either a
Shared asset (it will be added to the design system and available across all content in the SR)
Local asset (it will be added to the specific Slide for the Presentation)
Vault asset (it will be created as a Vault asset and will be available to import globally from Vault on all content)
The new asset will now be available to you.
Local/Shared/Vault Image differences
Shared assets are available for any content (Slide/Email/Brief) that uses this Design System
Local asset are only available in the current document
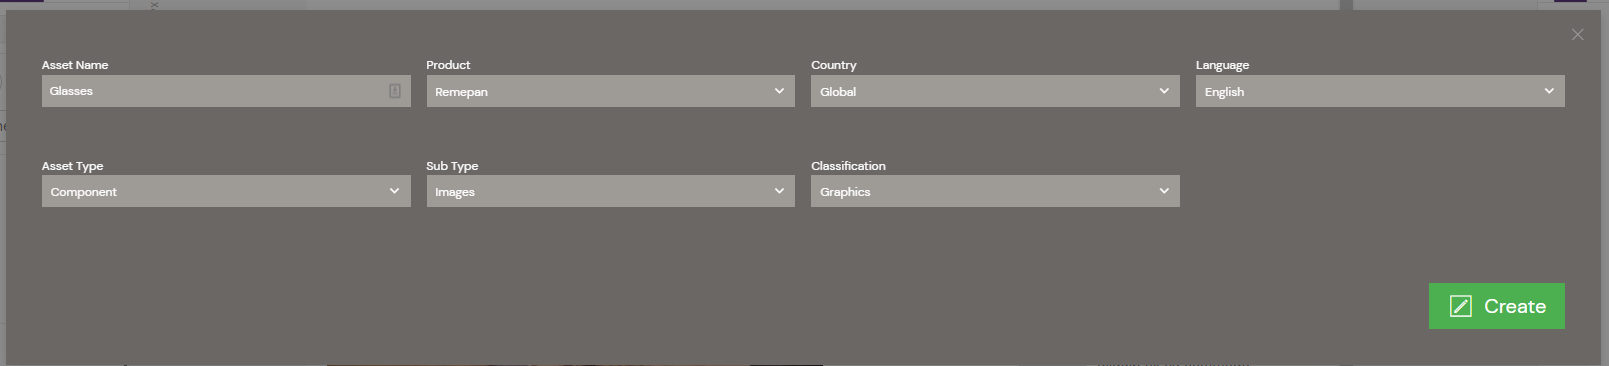
If you upload the media as a Vault asset your will be guided to add the required information and it will be created directly in Promomats. You can then import this media as a Local or Shared asset.
Note that Vault components have the usual Digital Asset workflows in Promomats and may need to be Approved before they are visible in your Activator instance.
Approved vs non-approved assets
When Activator is configured for your organisation, it may have been configured to only show Approved Promomats media assets in the Media browser to ensure that content is only authored using Approved materials.
Keep this in mind when uploading new media Components to Promomats. It is generally recommended to ensure that the necessary components for your project go through the Approval process before you start, as depending on your organisation it may take some time for them to be reviewed and approved.
Directly uploading images as Local or Shared assets is always possible but they will not be managed by Promomats and will not have their own Promomats Approval status and may require additional review in the MLR process.
The recommended Best Practice, if your organisation uses Promomats DAM features is to only directly upload non-critical media such as icons, shapes or other basic elements and to import your core media from Promomats using the Media Assets and the Media Library feature.