Slider
Inserts a slider on page
Requires a programmer to trigger events with data using ClickStream.
Read more about Track Clickstream Data here.
How to add a slider
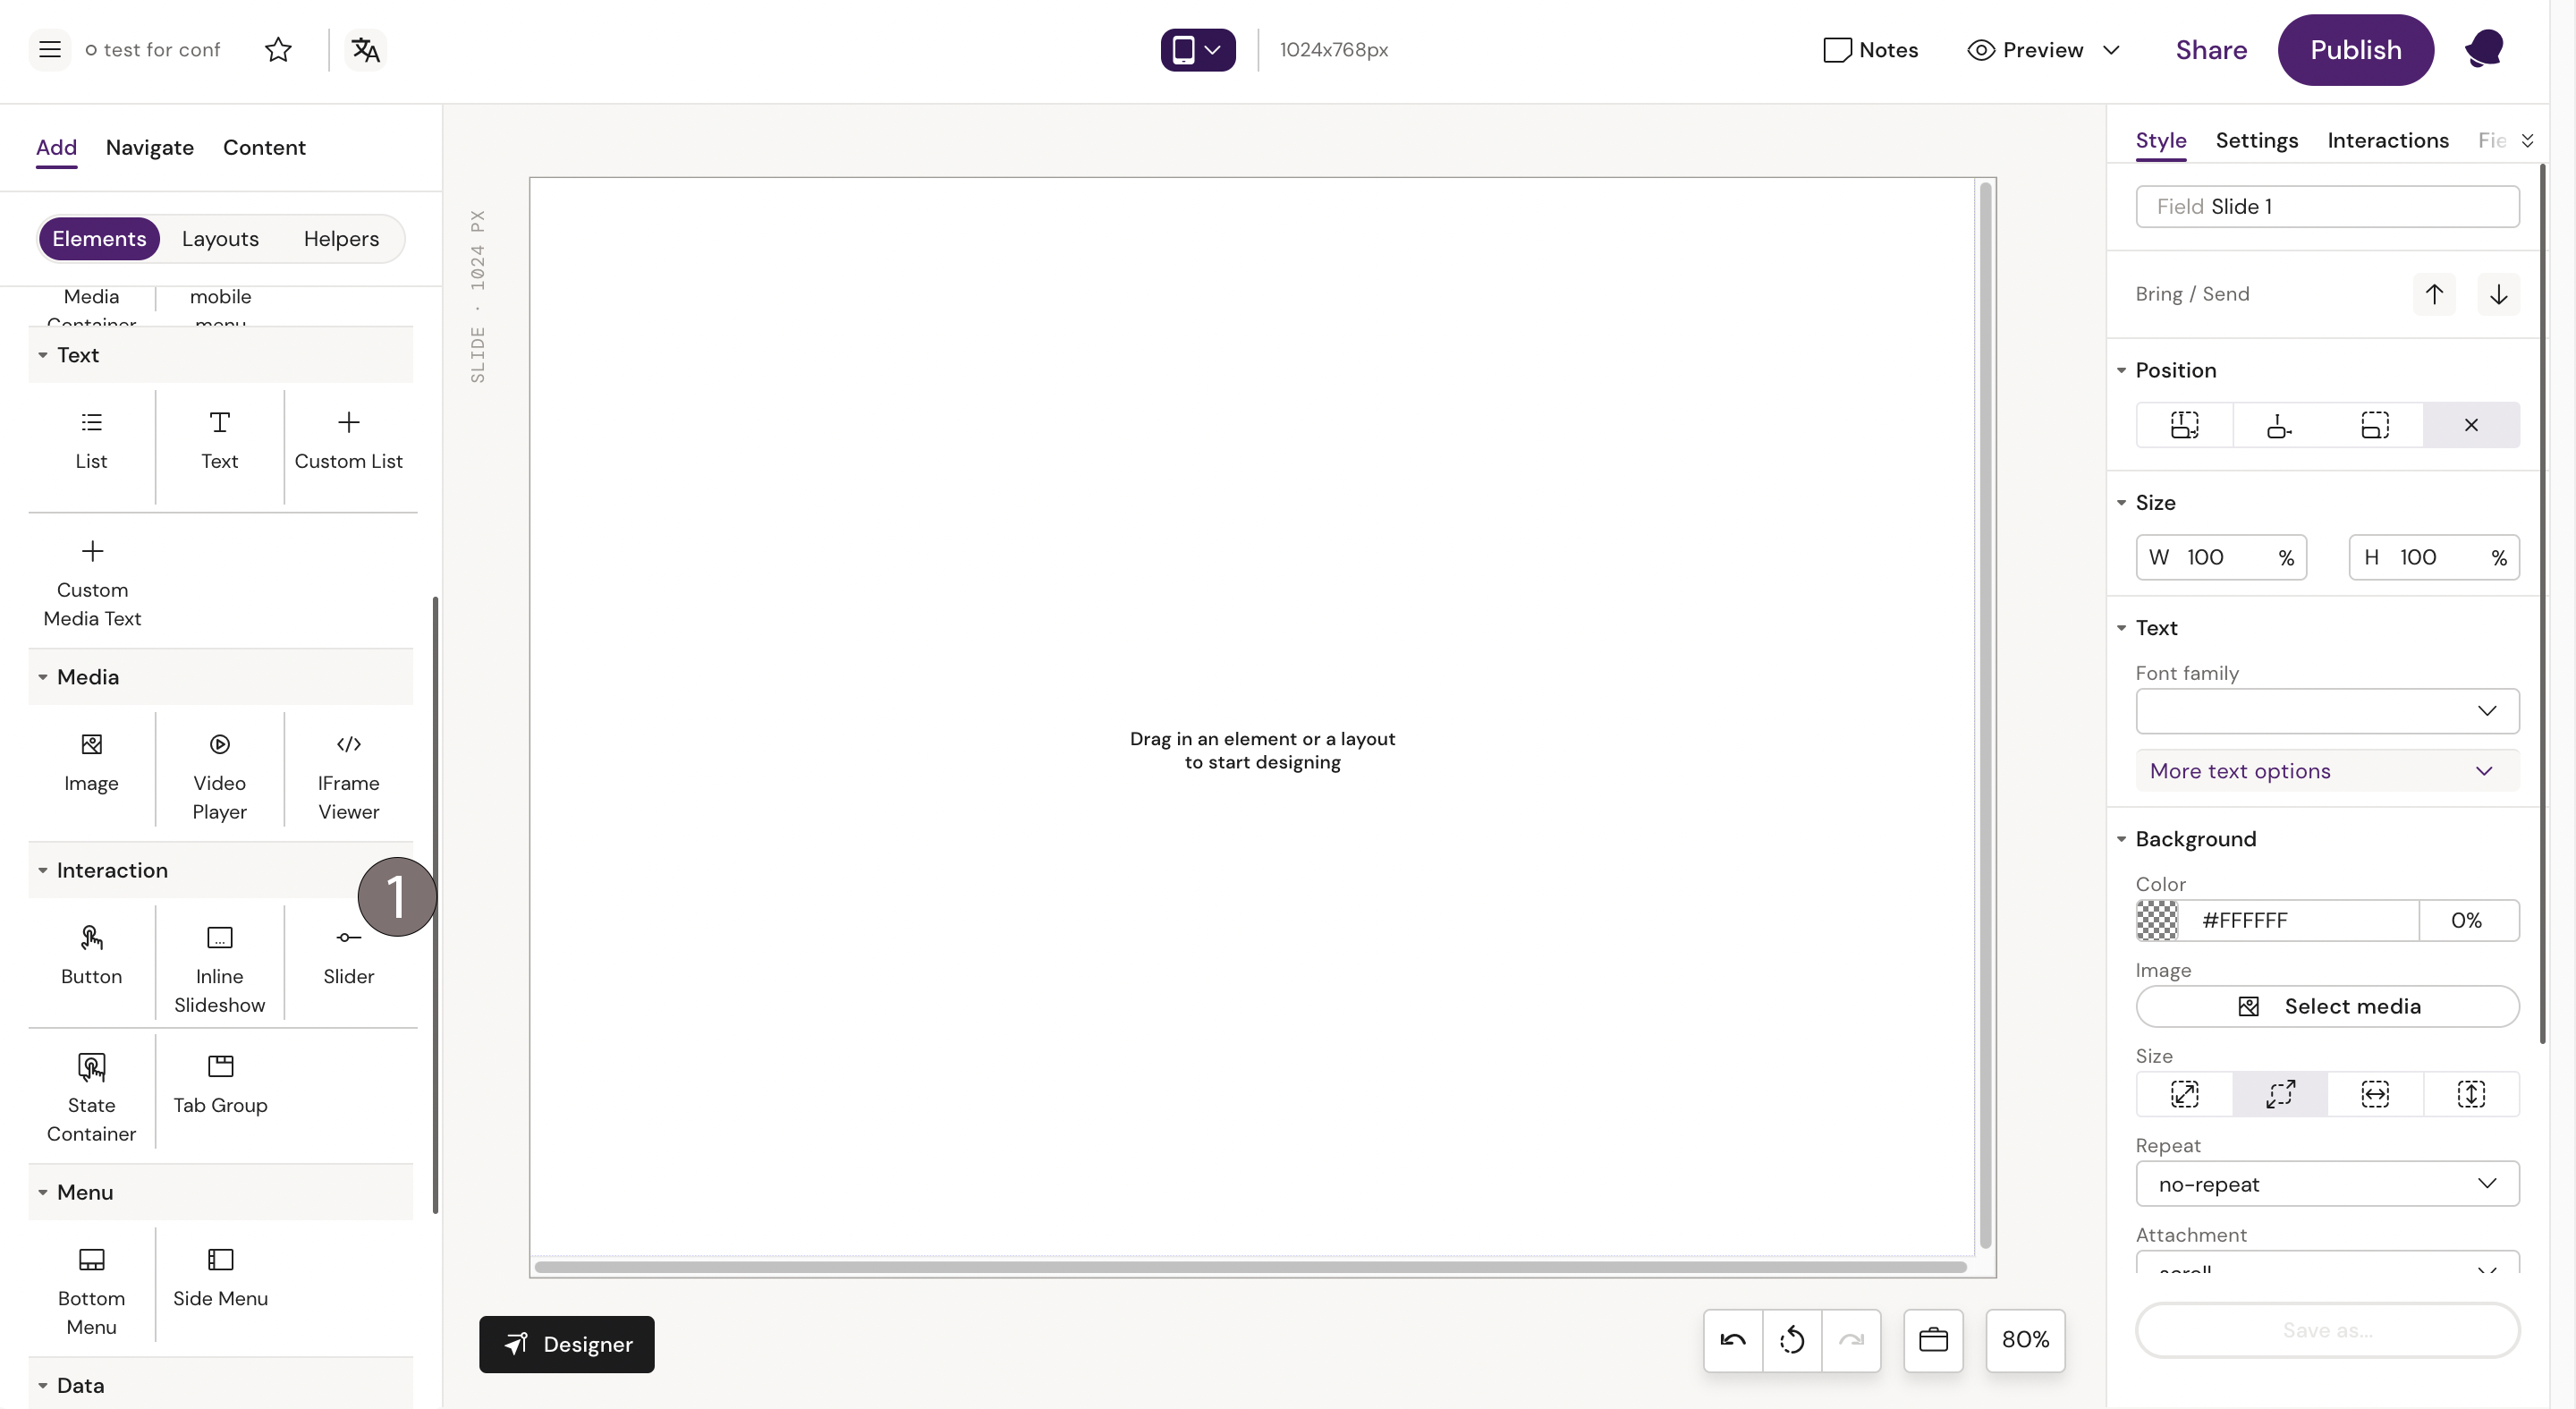
Select the “Slider” component from the components list. This will insert a slider on the page

Slider Specific Settings
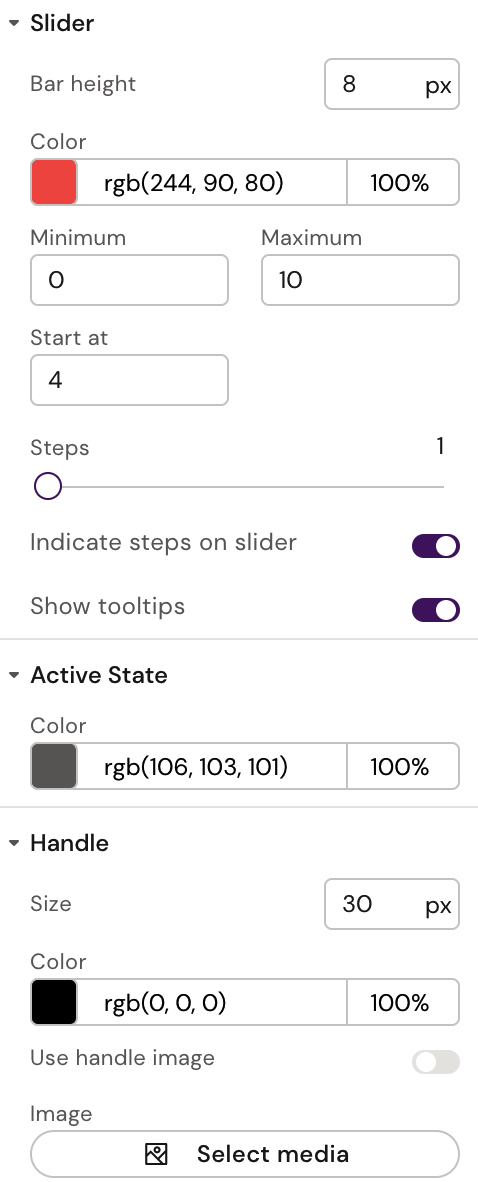
In the right hand menu you’ll find the following settings that are specific to a slider:
Slider properties (bar height, color, min and max values etc)
Active state color (color of the bar to the left of handle)
Handle properties (size, image and color)

Capture Data with Slider
This component needs to be setup in the code to trigger events with data. The custom JavaScript can either be setup in the design system (shared resource) or the document specific JavaScript file. The examples below have it setup in the document specific file.
Getting Data from the Slider
We need to be able to reference the slider in the script, and we can do this by querying one of these:
fusion-slide element (will get multiple sliders if they exist on page)
class name (will get all sliders/elements with specific class)
id (will get a single element)
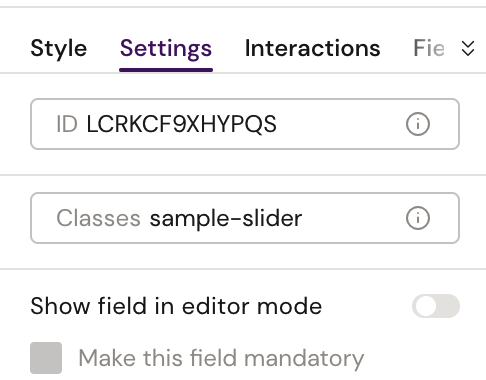
The last two are recommended and custom id and classname can be setup in Activator menu:

Example:
const slider = document.querySelector('.sample-slider');Next we need to listen for an event when the slider changes. There are a few options:
slider-change (custom event that outputs the slider value in event)
input
mousedown/up
touchstart/end
The slider-change event is the easiest to use as the value of the slider is available in event.detail. However, it will be called for every value change, e.g. going from 1 to 5 on the slider will result in listener function being called 4 times. If you’re only interested in the value when releasing slider handle, then mouseup and touchend event should be used. The slider data is stored on the slider element itself (event.target). Here are some of the useful data on the element:
controlMin/Max (the min and max values possible on slider as string, e.g. “0” and “10”)
range (the max value as integer, e.g. 10)
sliderOutputValue (the value of the slider as string, e.g. “5”)
sliderPosition (an integer value from 0 to 100)
Simple example:
const slider = document.querySelector('.sample-slider');
if (slider) {
  slider.addEventListener('slider-change', function(event) {
    console.log('The value of the slider is', event.detail);
  });
}
Advanced example:
const slider = document.querySelector('.sample-slider');
const sliderUpdate = (event) => {
  console.log('The value of the slider is', event.target.sliderOutputValue);
}
if (slider) {
  slider.addEventListener('mouseup', sliderUpdate);
  slider.addEventListener('touchend', sliderUpdate);
}
Full example of updating a text element and logging the value:
const slider = document.querySelector('.sample-slider');
const sliderValue = document.querySelector('.sample-slider-value');

const sliderUpdate = (event) => {
  const value = event.target.sliderOutputValue;
  sliderValue.textContent = value;
  if (Fusion && Fusion.trackCustomData) {
    Fusion.trackCustomData({
      id: 'sampleSlider',
      answer: value
    });
  }
}

if (slider) {
 slider.addEventListener('mouseup', sliderUpdate);
 slider.addEventListener('touchend', sliderUpdate);
}