Using Translation Files for Localization of Content
When you need to translate bigger projects, it is often preferable to use a translation agency for the task.
Activator™ is capable of extracting XLIFF files which are an industry-wide standard for delivering text files to translators. Activator™ can also export Excel translation files for those who prefer to make their changes in that format.
You can download XLIFF/Excel files for individual slides and entire binders.
The file will download as a zipped package with each individual XLIFF/Excel file inside its own folder. The folder name indicates the binder ID and versioning.
The files themselves consist of source and target, where the source is the original text and the target the translation.
If you would like to do your translation directly in Activator, you can use the Compare and Translate feature to easily translate your content.
Before you get started
Make sure you are not simply translating your Master or source document!
When you are preparing a local copy of a document or presentation you should duplicate it for your Country and Language. Please refer to the documentation on how to copy different document types:
Translating a document with XLIFF or Excel files
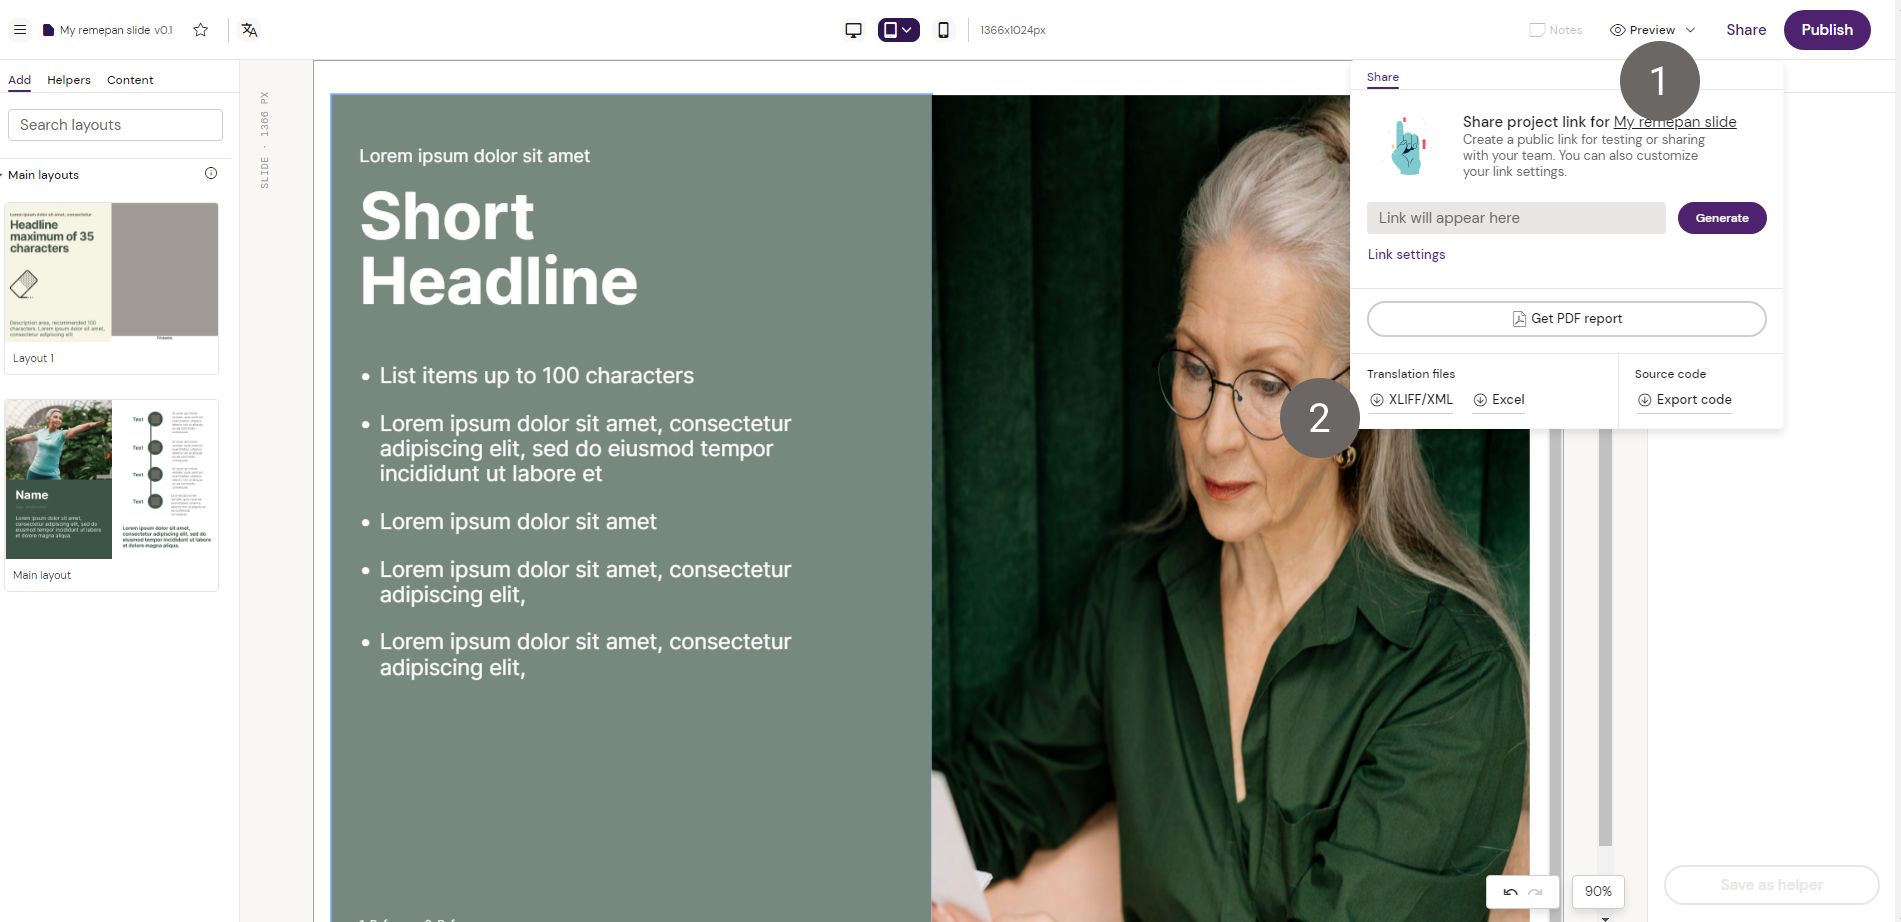
Step 1: On the slide from which you wish to export the XLIFF/Excel file, please select the “Share” option in the top-right menu.
Step 2: From there select the “XLIFF/XML” or “Excel” file option

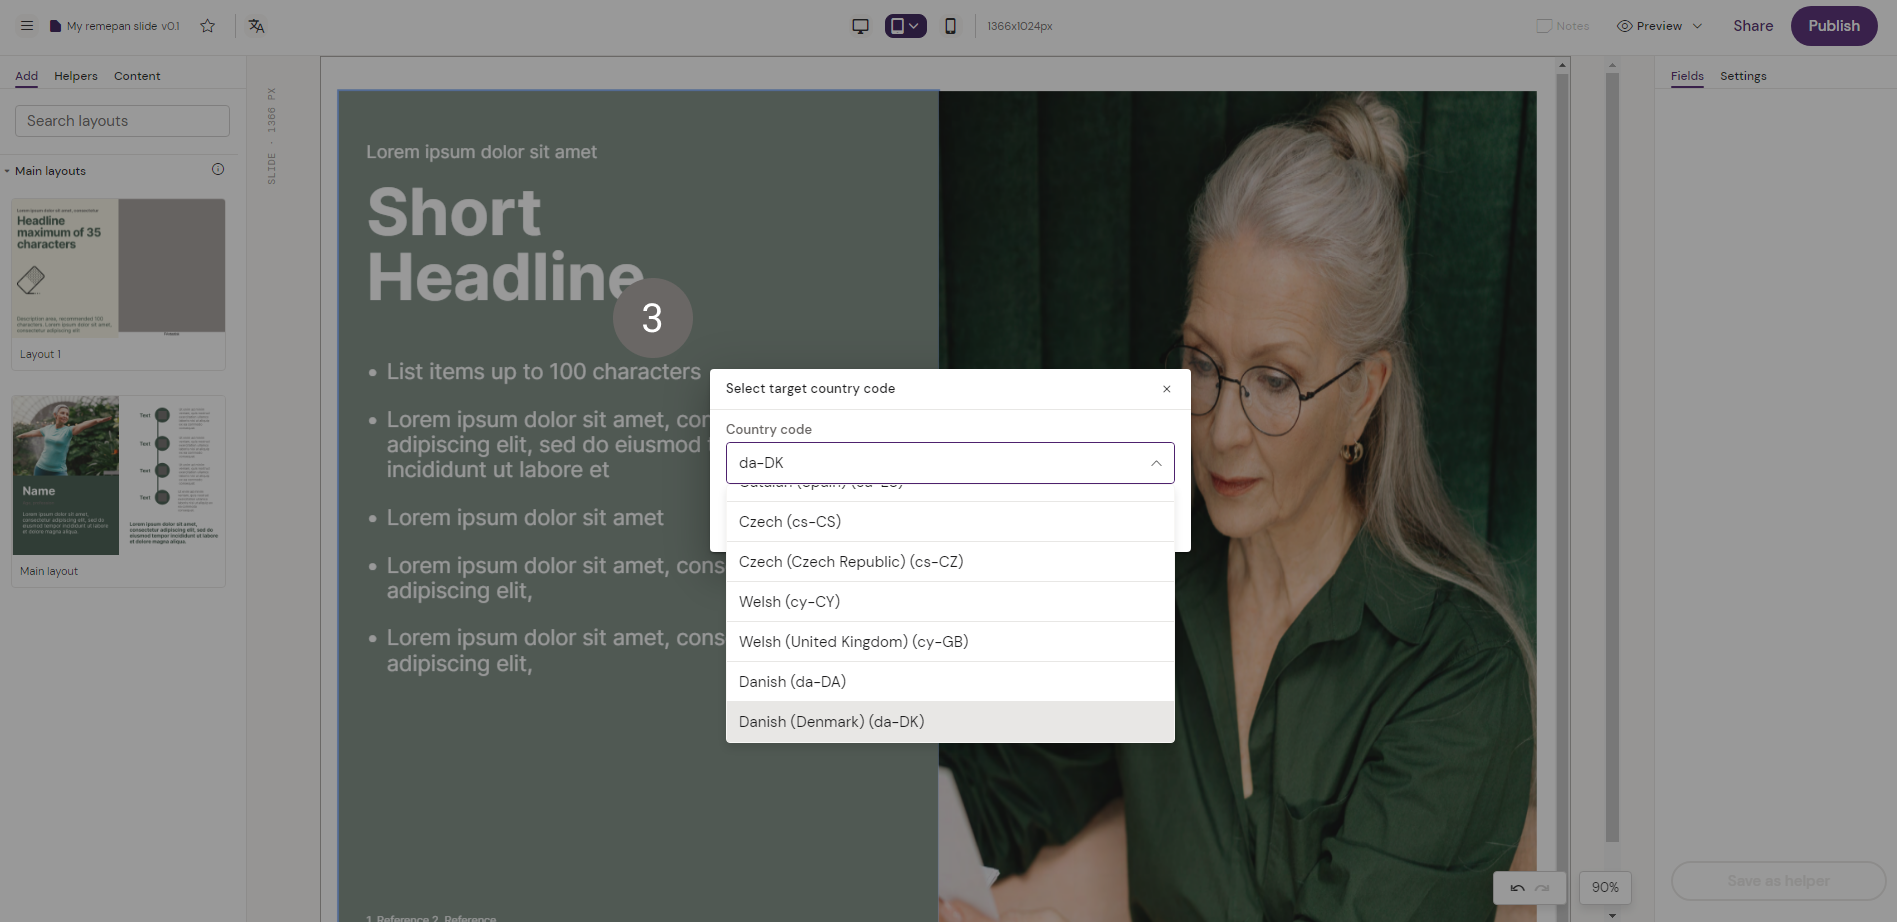
Step 3: You will then be prompted with a country code dropdown. Pick the country code that you want to localize to.

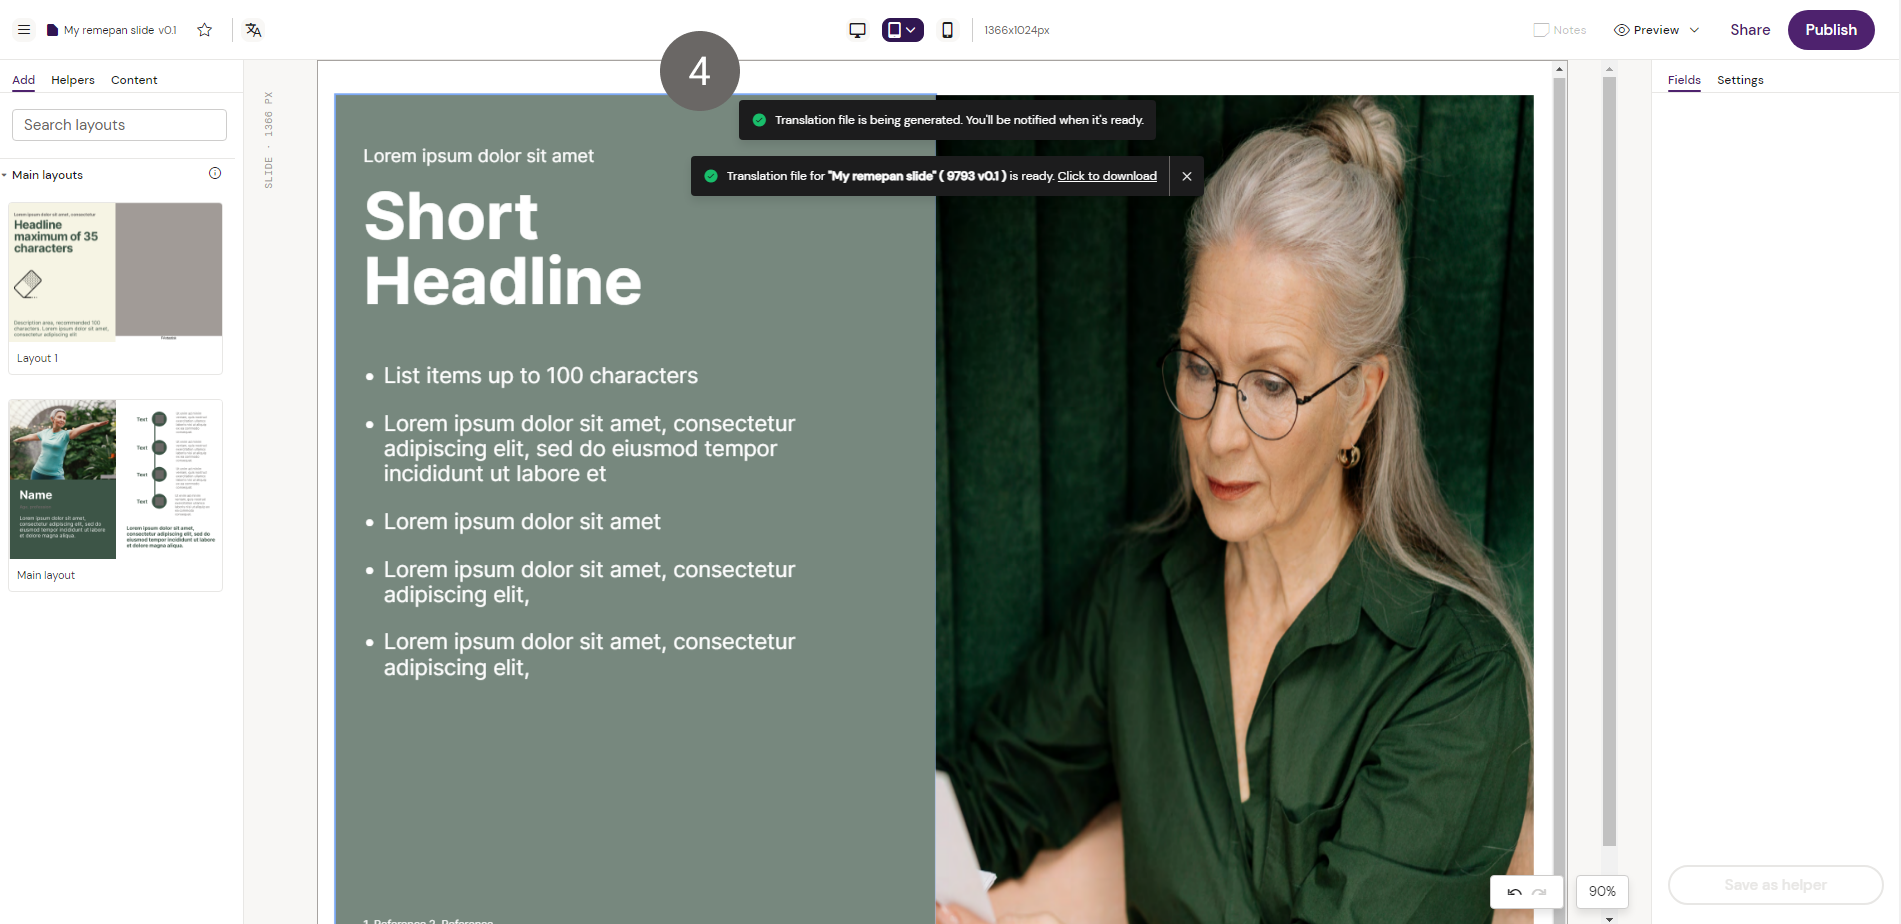
Step 4: You will then be prompted with a message that states your download is ready. Click the “Click to download” button. Send the files to a translation agency of your choice.

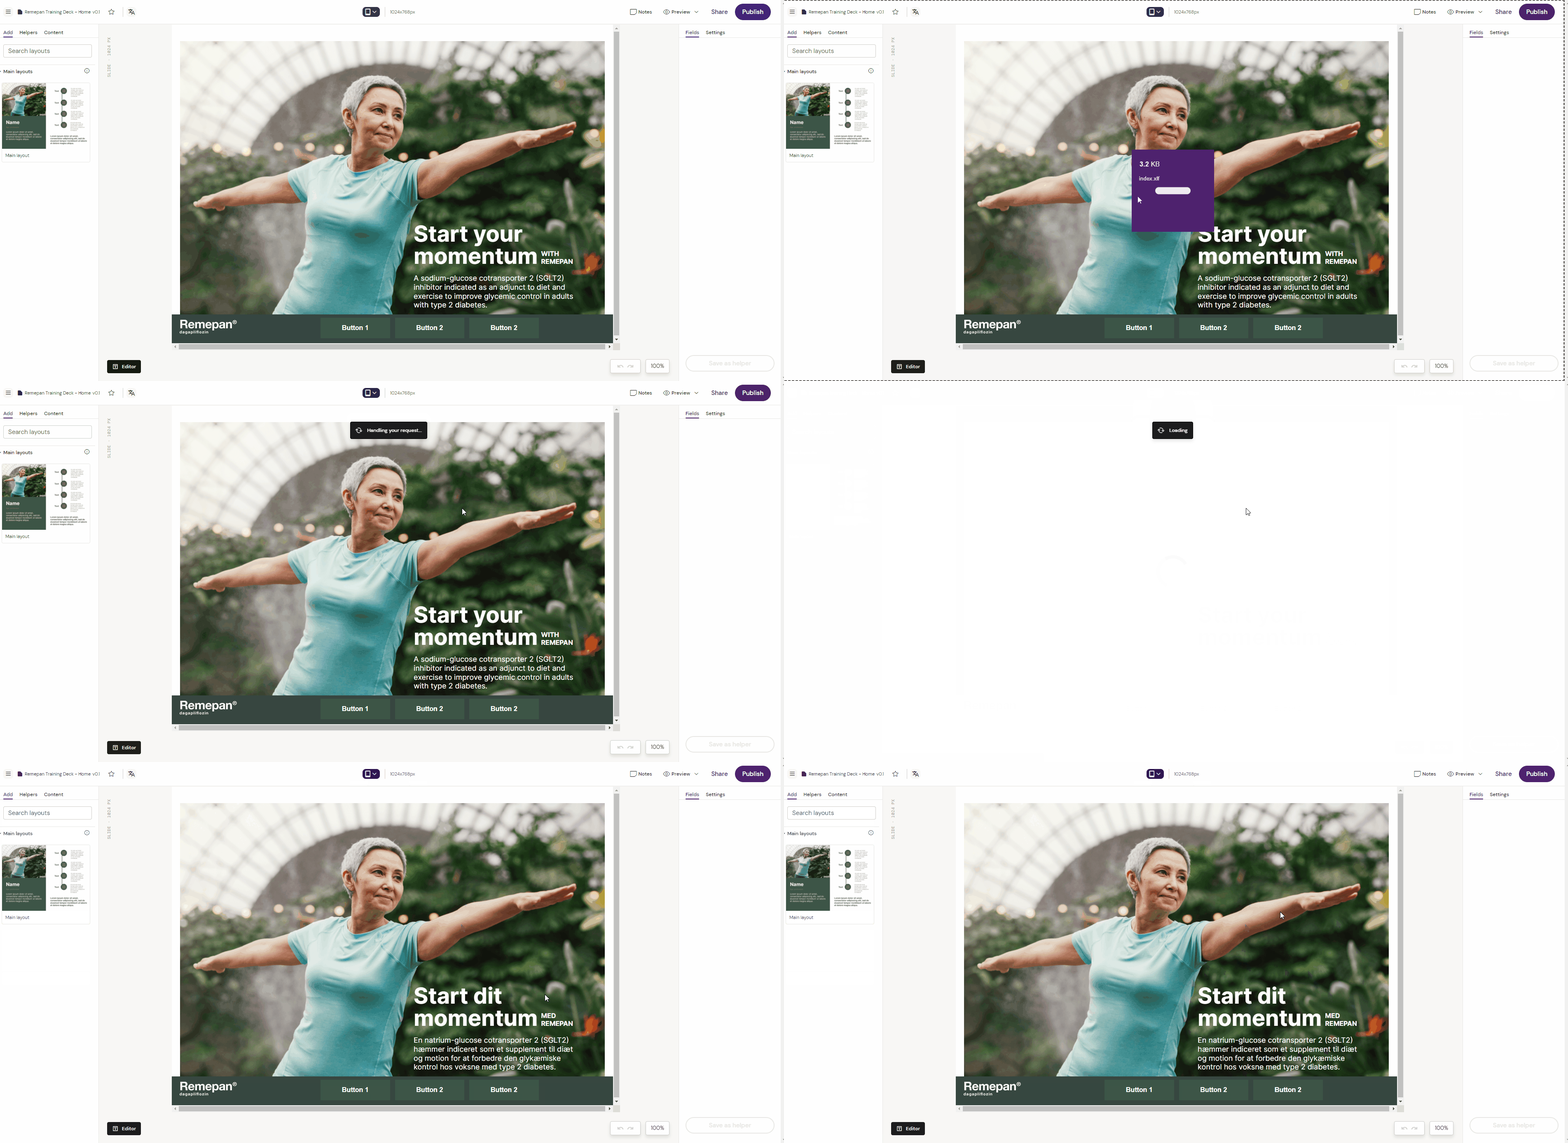
Once you’ve received a translated XLIFF/Excel file back from the translation agency, navigate to the slide that should be translated and drag & drop the new XLIFF/Excel file directly into Activator. You will be asked to chose if you wish to update the current slide you are on or if you would like to apply the changes to a different slide. Once the choice has been made, the Activator will reload and the changes will be visible in the slide.

Translating an entire Binder of content at once
The steps are the same as localizing a Slide. But instead you should choose the “Share” option from the binder.
Step 1: On the binder from which you wish to export the XLIFF/Excel file, please select the “Share” option in the top-right menu.
Step 2: When you receive the files back from being translated, ZIP the folder and drag and drop it into Activator. Excel files do not need to be zipped.
Localizing text in slide fragments
Slide Fragments are located inside the shared resource. Each fragment can be edited manually or extracted in the same manner as stated above. You can export the XLIFF or Excel and then import it by dragging and dropping the file back into the shared resource.
Step 1: Open the shared resource in Activator, scroll down and select the “Share” option in the meta data section.
Step 2: When you receive the files back from being translated, ZIP the folder and drag and drop it into Activator. Excel files do not need to be zipped.
Important notice on brackets in text.
Since brackets "< >", also known as chevron and angle brackets, are used to indicate the start of code in HTML and XLIFF, it is important that your slide text does not contain the following combination of brackets and letters:
"<This" won't work
Instead, write: "< This"
Following combinations are OK
>This
<2 is more than one
>1 is less than 0
The system will let you know if your text contains the bracket/letter combination when you upload it. Go through the text to correct it and insert a space, save and reupload.
For localization files, brackets will be represented as following:
XLIFF: %3E = > and %3C = <
Excel: < = > and > = <
Editing localization files
Translation files will contain any basic text formatting that may have been added to the text, such as <b> and <i> tags. If your translated text does not include these you may need to apply formatting to specific words in your content via the WYSIWYG editor or the Compare and Translate view once you import your file again.
