
Helpers are reusable ready-made sections you can insert into documents to work faster and stay consistent. A helper is typically a layout with content already filled in. For example a finished CTA block, a pre-written footer, a standard disclaimer section, or a commonly used product block.
If layouts are the structure, helpers are structure + content.
Who this is for
Content Editors (most common)
-
Create helpers from layouts after filling in content
-
Reuse helpers across documents to avoid repeating work
-
Use shared helpers created by others on the same Design System
Designers / Brand Designers (sometimes)
-
May also create helpers, but they typically focus on layouts and Design System governance
Varies by tenant (Anthill-managed)
Helper availability, where they appear in the UI, and whether they are shared depends on your tenant configuration and Design System setup. Learn more.
When to use helpers
Use helpers when you need to reuse the same finished section repeatedly, for example:
-
Standardised headers or footers
-
Campaign CTA blocks used across multiple emails/slides
-
Repeated “indications / safety / legal” blocks
-
Product blocks with specific text + image + link
-
Common patterns that should look and read the same every time
Use layouts when you need reusable structure that will be filled differently each time.
Use helpers when you need reusable structure and content that is mostly the same.
What helpers are (and what they are not)
Helpers are
-
Built from a layout (or a layout-like section)
-
Saved to the Design System so they can be reused
-
Inserted into documents by drag-and-drop or insert actions (depending on UI)
Helpers are not
-
A replacement for templates (templates define starting points for entire documents)
-
A cross-channel reuse mechanism (helpers are typically channel-specific)
-
A way to globally change content everywhere automatically (they are reusable inserts, not “live references” in most setups)
Key rules to understand
1) Design System and document type must match
Helpers are tied to:
-
a specific Design System
-
a specific document type/channel (Email helper vs Slide helper)
That means:
-
An Email helper can be used in Email documents using the same Design System
-
A Slide helper can be used in Slide documents using the same Design System
-
You typically cannot use a Slide helper inside Email (or vice versa)
This prevents styling and component dependencies from breaking.
2) Ownership and sharing
Helpers are usually shared within the Design System, but editable rules apply:
-
You can edit and overwrite your own helpers
-
You can use other people’s helpers
-
You typically cannot edit someone else’s helper directly
-
If you want a variant of a shared helper, you copy it into your own content, modify it, and save it as a new helper
Varies by tenant (Anthill-managed)
Some tenants may disable sharing or limit it by role. Learn more.
Create a helper
Before you create a helper, you need a finished section in your document—typically a layout that you have filled in with text, images, links, and any required fields.
Steps
-
Open a document in the Editor
-
Insert the layout you want to turn into a helper (if it isn’t already in the document)
-
Fill in the content (text, images, links, optional fields)
-
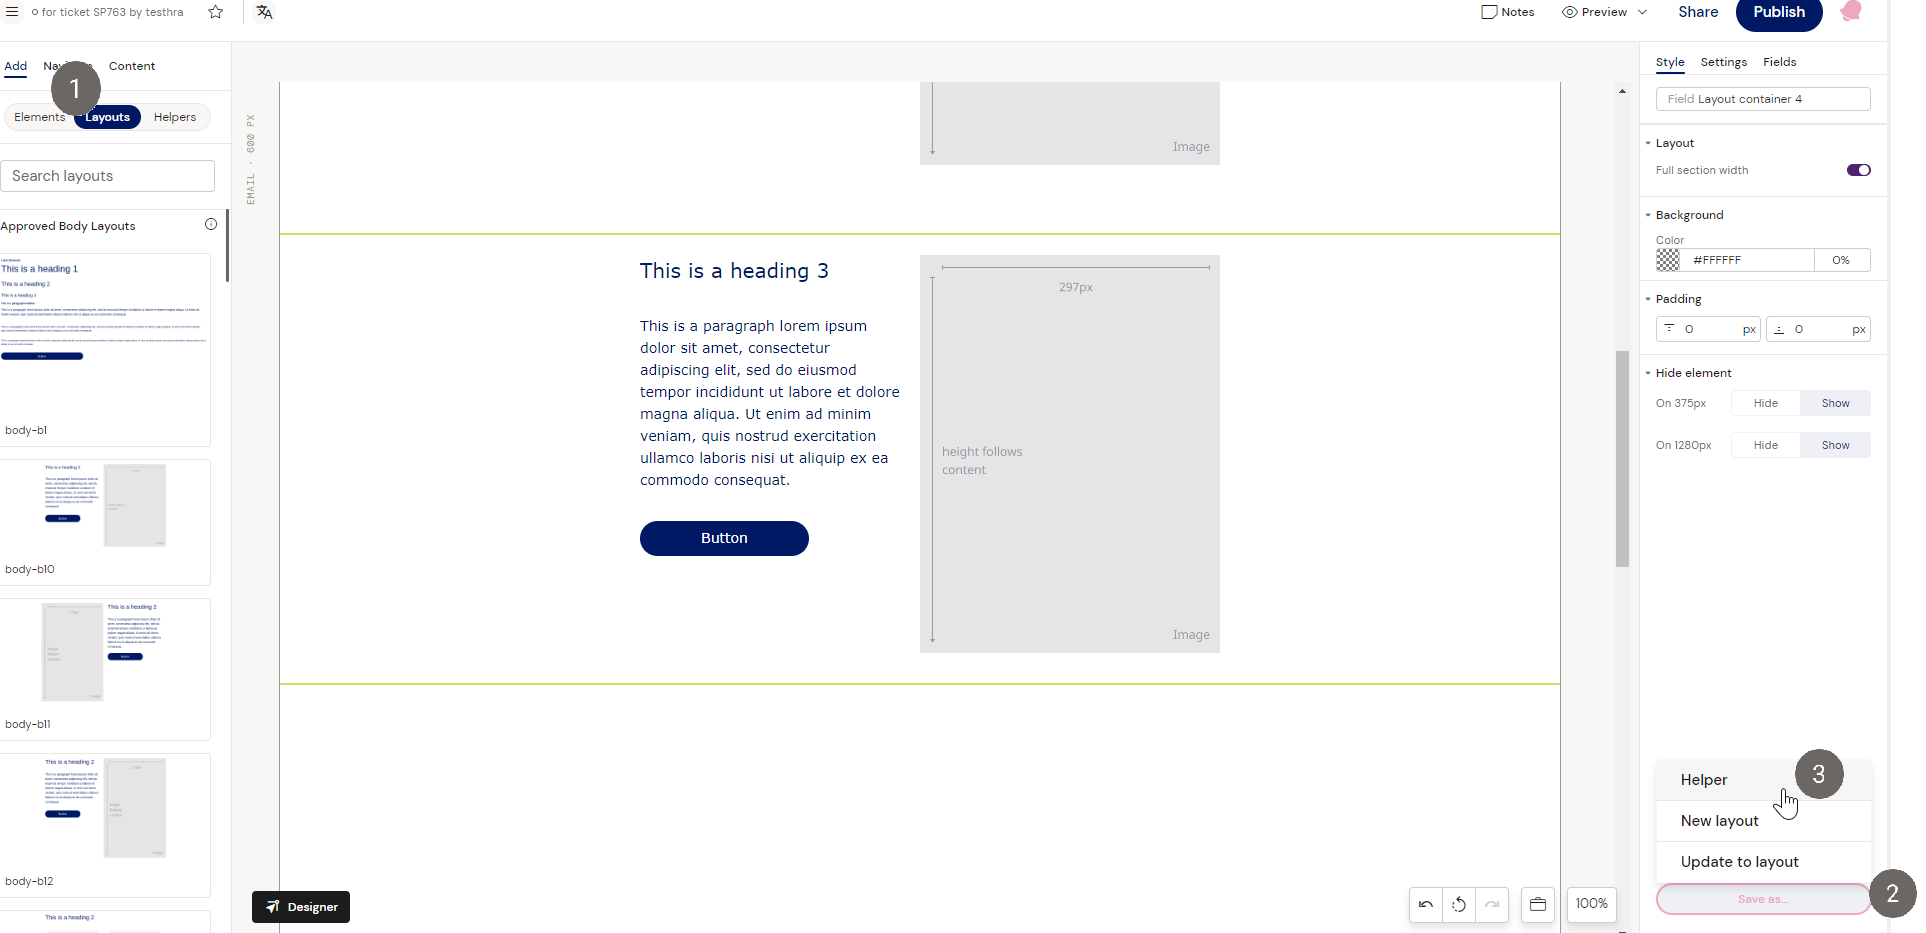
Select the layout section you want to save (select the top-level container/row for that section)
-
Use Save as → Helper (label may vary)
-
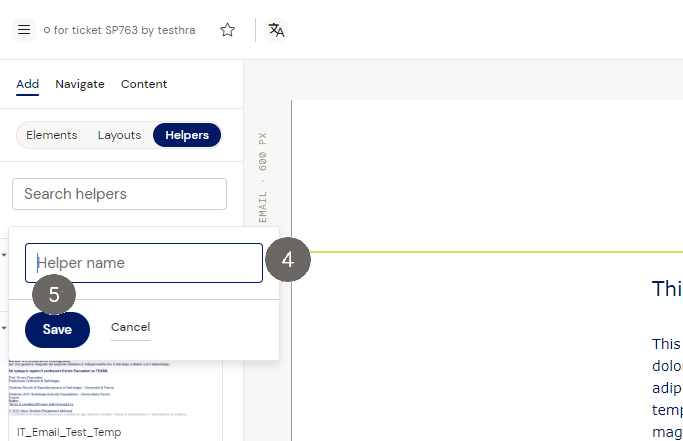
Give the helper a clear name
-
Click Save
What you should see afterward
-
The helper becomes available in your helper list (often under My helpers)
-
If sharing is enabled, other users may see it under Shared helpers
Naming tip
Name helpers so editors can pick the right one quickly, for example:
-
“Footer – Standard – EN”
-
“CTA – Request demo – EN”
-
“Safety block – Short – DK”
-
“Product block – X – Image left”
Use a helper
Insert a helper into a document
-
Open the target document in the Editor
-
Go to the helpers list (often under Content → Helpers)
-
Find the helper under My helpers or Shared
-
Drag and drop (or insert) the helper into the document
-
Edit allowed fields/content if needed
What happens after insertion
-
The helper is inserted as normal content in the document
-
You can usually edit it like any other section (subject to layout rules and role permissions)
Use a shared helper as a starting point
If you want to modify a shared helper:
-
Insert the shared helper into your document
-
Make your changes
-
Save it again as a new helper (your own)
This preserves the original shared helper and avoids stepping on other teams’ usage.
Best practices
-
Keep helpers small and focused (one purpose per helper). Don’t save an entire page as one helper unless you really mean to.
-
Use naming conventions for:
-
channel (Email/Slide)
-
purpose (CTA/Footer/Disclaimer)
-
language/market (EN/DK/JP)
-
variant (Short/Long/With image)
-
-
Prefer helpers for “standard content blocks” and layouts for “standard structure blocks”.
-
If you need controlled reuse with strict traceability, consider whether modular content is a better fit (tenant-dependent).