
Content modules are created from the Content Modules list in Activator. From there you can start with a blank canvas or import an existing PDF to seed the module with content.
Where to start
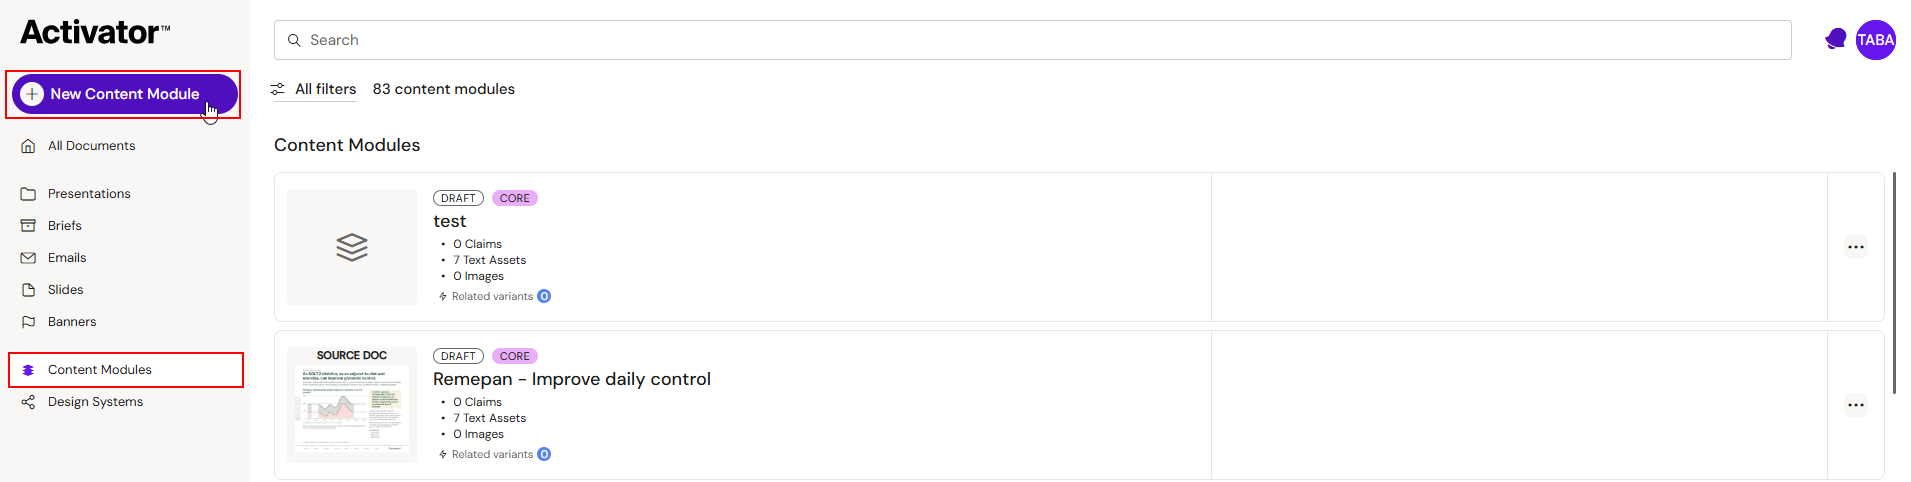
The Content Modules list shows every module in the tenant with filters for Product, Country, Region, Category, Segmentation, Phase, and Tags across the top. Click New Content Module (blue button, top-left of the sidebar) to begin.
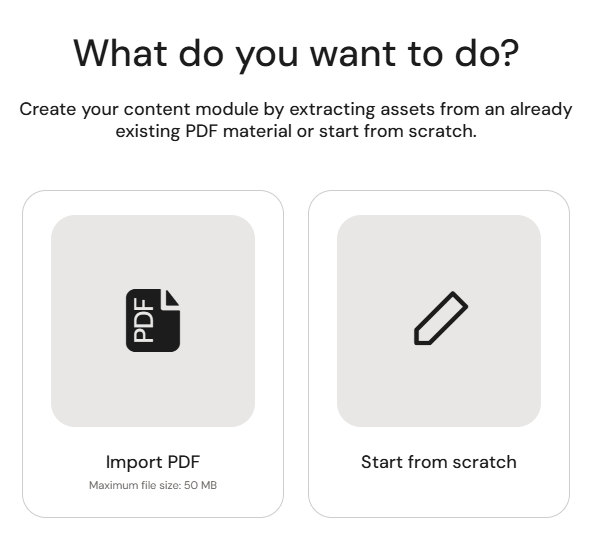
The next screen asks What do you want to do? and gives you two options:
-
Import PDF — pick a PDF from your computer to use as the source. The canvas opens in PDF mode with autoscan available for content extraction.
-
Start from scratch — begin with an empty canvas where you type content directly into each field.
Starting from scratch
The scratch path is a two-step wizard.
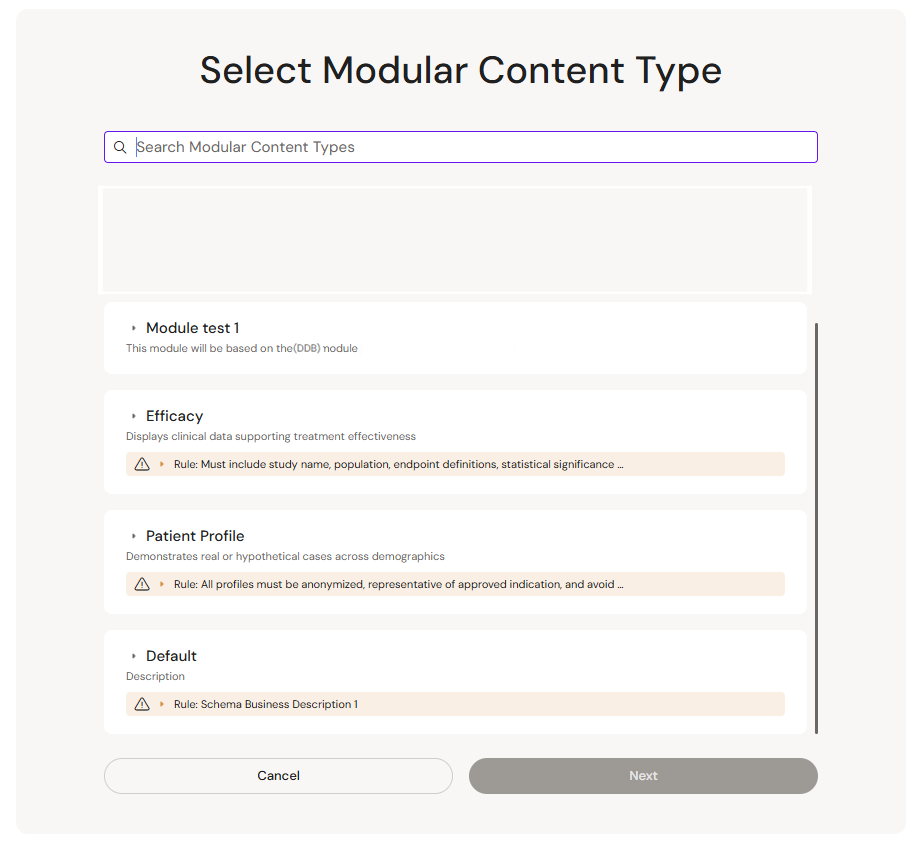
Step 1 — Select Modular Content Type. Choose from the content module types configured for your tenant. Content module types are set up per tenant during onboarding, and each type defines which fields are required and their default order. A type might include labels like Headline (required), Subheadline, Paragraph, Footnote, Reference, and Image, but the exact set varies by tenant.
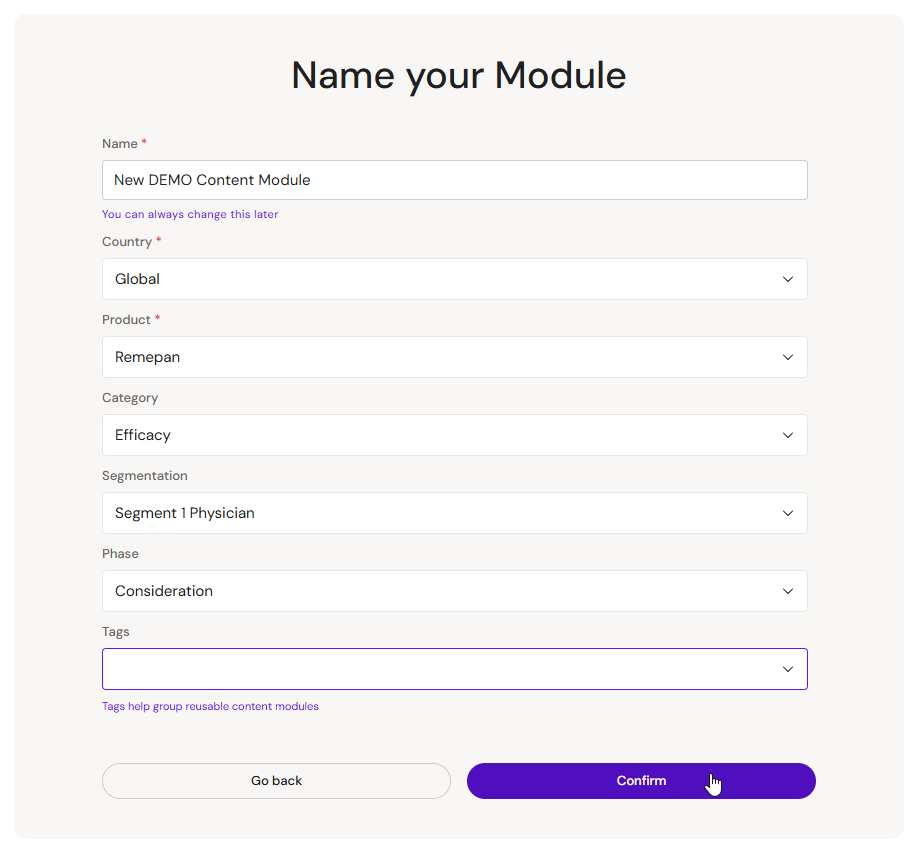
Step 2 — Name your module. Fill in the module's identifying metadata:
-
Name (required) — the module's title. You can change this later.
-
Country (required)
-
Product (required)
-
Category
-
Segmentation
-
Phase
-
Tags — for grouping reusable modules
Some of these fields map to metadata fields in the connected DAM (Aprimo or Vault) on publish. Which ones map, and to which DAM fields, is set during tenant onboarding and varies by tenant.
Click Confirm and the module is created in draft state. The canvas opens ready for authoring.
Starting from a PDF
The PDF path adds an upload and page-selection step at the start.
Step 1 — Import PDF & Select Pages. A file picker opens; choose the PDF you want to use as source material. An upload progress dialog runs while the file transfers, showing the percentage complete and offering Cancel upload until it finishes. If the selected PDF exceeds the allowed 50 MB, the upload is rejected immediately with an error message and the transfer does not start. Once uploaded, a page grid appears with thumbnails of every page in the document. Tick the pages you want to extract content from and click Continue. You can always come back and import more pages later from the canvas.
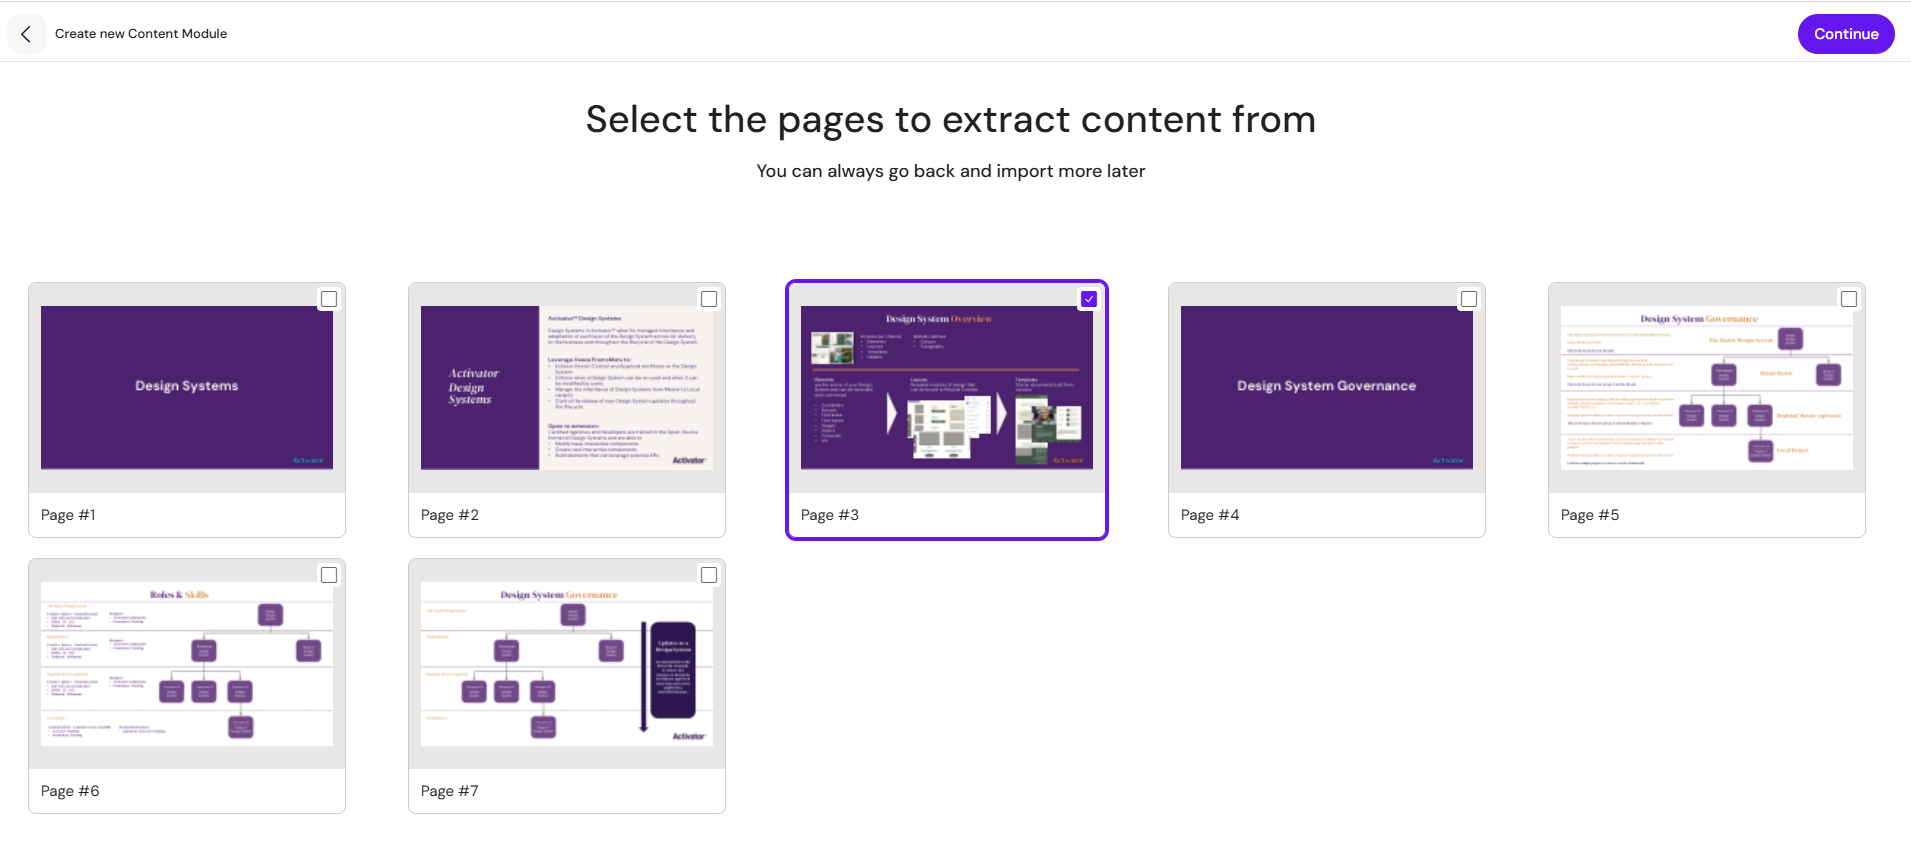
Step 2 — Select Modular Content Type. Same as the scratch path: pick the type that matches the module you want to build.
Step 3 — Name your module. Same metadata form as the scratch path.
Click Confirm and the module is created. The canvas opens in PDF mode with the source document on the right, ready for autoscan or manual extraction.
What appears on the Content Modules list
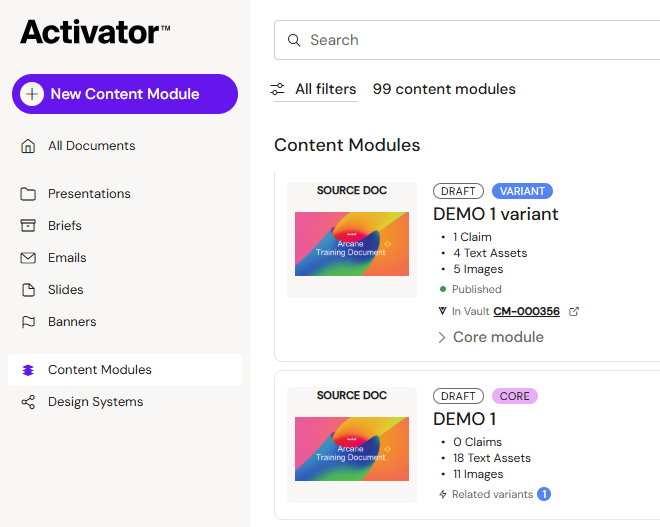
Newly created modules appear at the top of the Content Modules list with a card showing:
-
Source document thumbnail (for PDF imports)
-
DRAFT / PUBLISHED label
-
CORE / VARIANT label
-
Module name
-
Stats: number of Claims, Text Assets, and Images
-
Vault ID and link once published (e.g. CM-000350)
The card menu (…) offers Open in Vault, Edit Content Module, Create a variant, and Delete.
Core modules and Variants
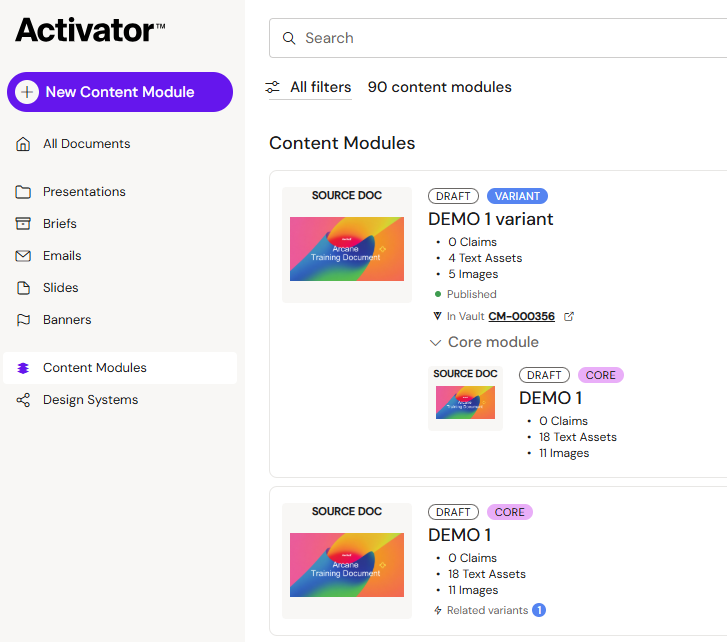
Every content module is either a Core module (a stand-alone module that other modules can be built from) or a Variant of a core module. Variants inherit from their core and can carry differences in localisation, segmentation, or channel-specific adaptation. The distinction is set at creation and shown on the card and the module header.
To create a Variant from an existing module, use Create a variant from the card menu, or use the + Variant button next to a module's name inside the authoring view.
Next: authoring
Once created, the module opens on the Authoring Canvas where you populate fields. See Module Authoring Canvas for how the canvas works.