
The authoring canvas is where you build a content module. It has two modes depending on how you started: a single-column canvas for modules created from scratch, and a two-column canvas for modules created by importing a PDF.
The two canvas modes
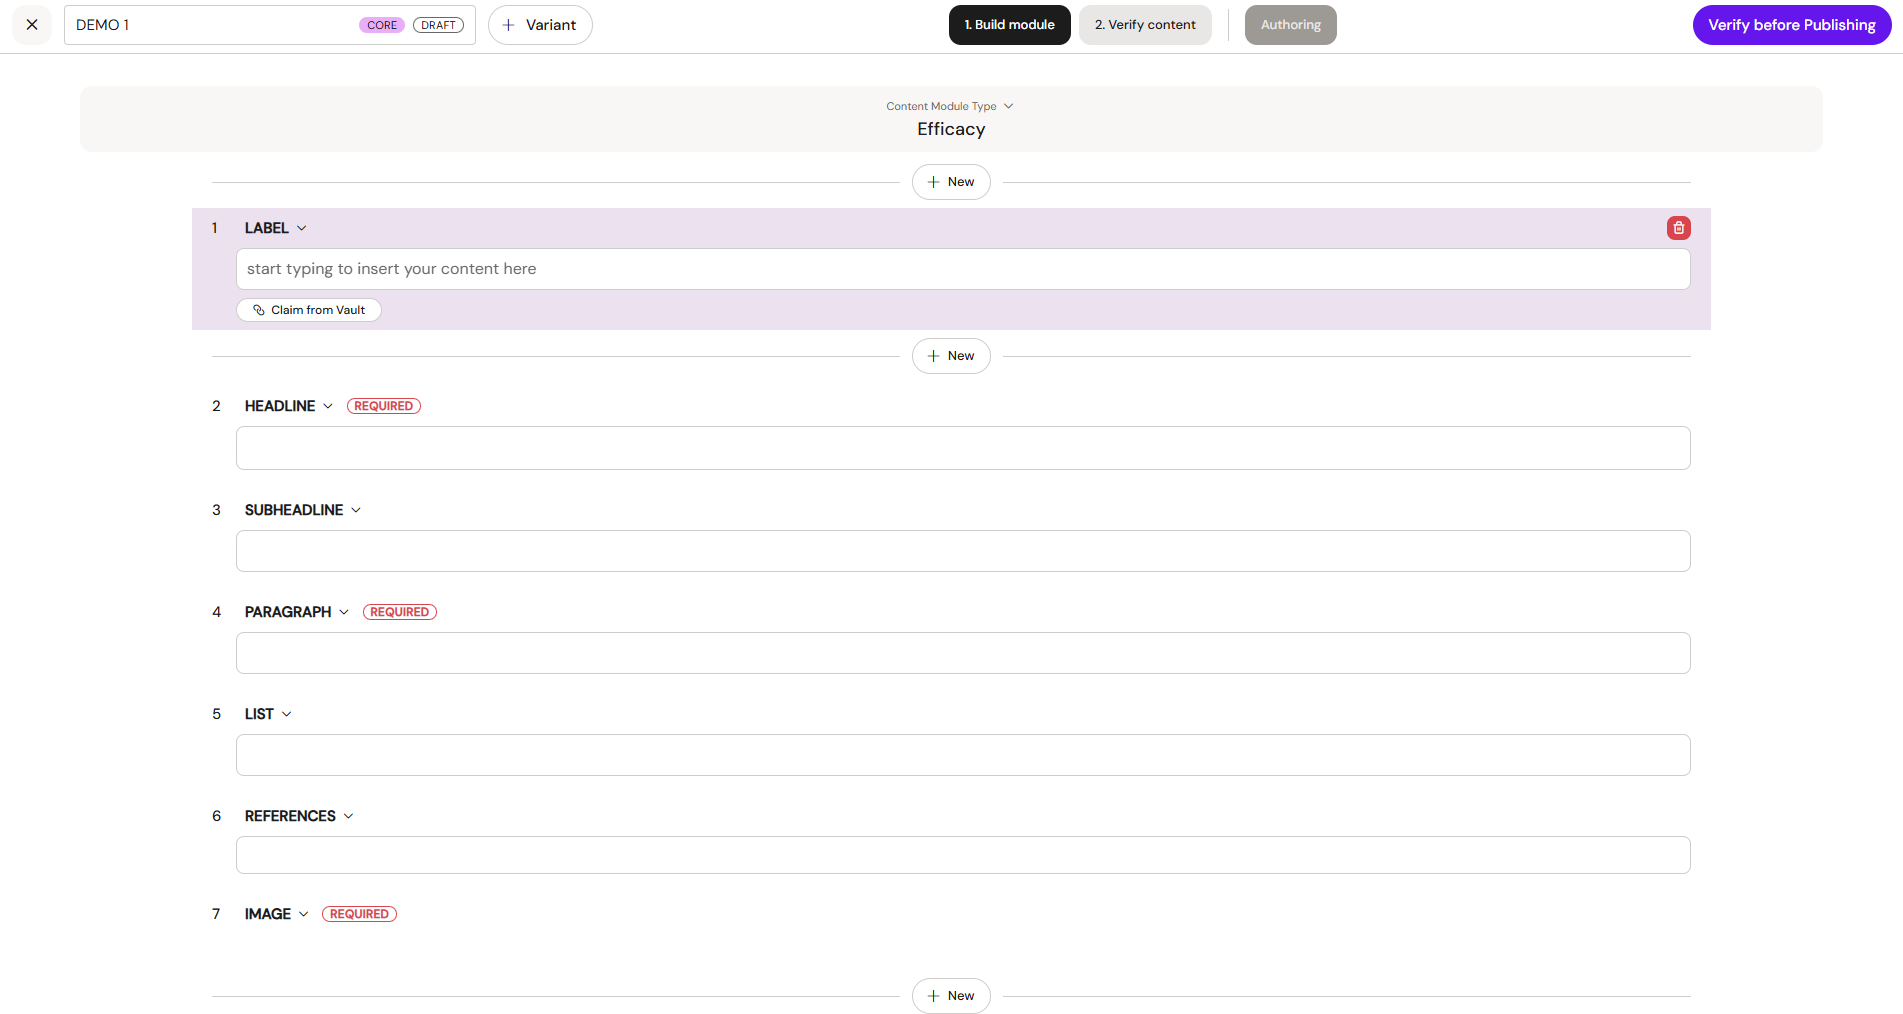
Scratch mode shows a single centred column with numbered field slots. You type directly into each field. The top navigation shows 1. Create content and 2. Verify content, with an Authoring state indicator on the right.
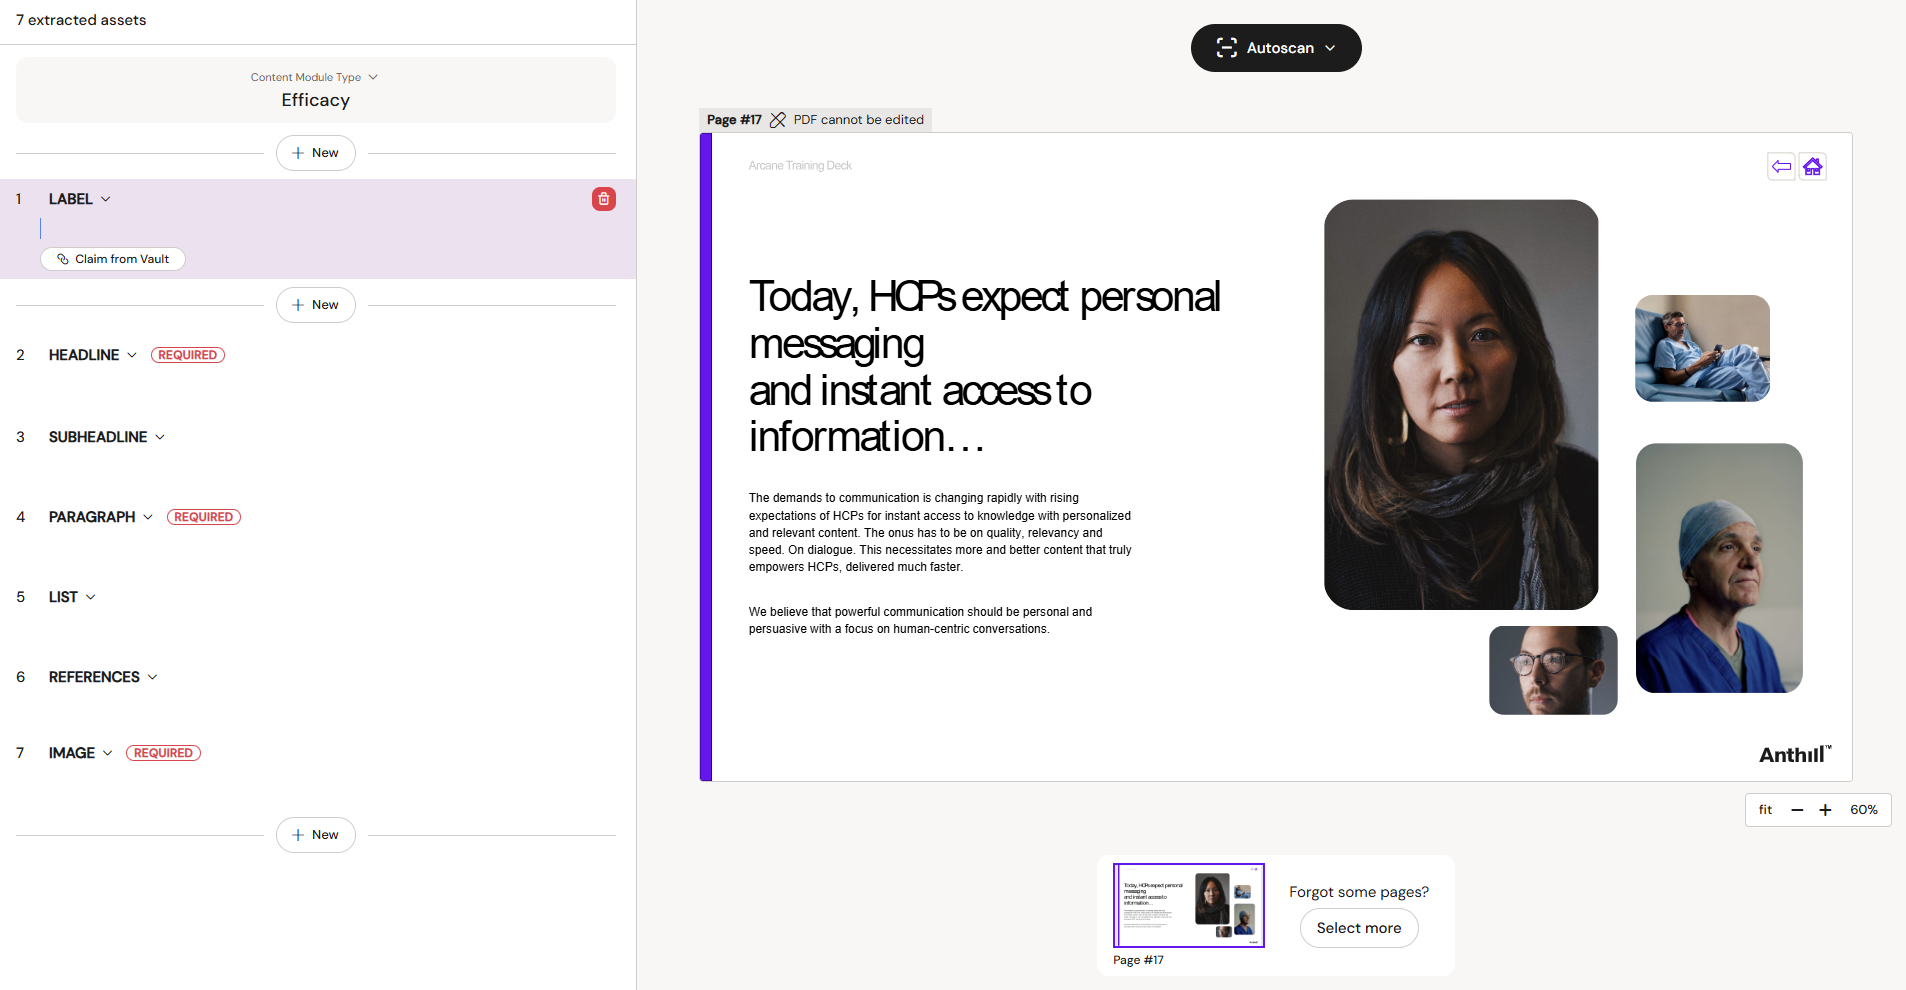
PDF mode shows a two-column view. Fields sit on the left, the source PDF sits on the right (read-only, indicated by "PDF cannot be edited"). Fields are populated either by manual marking or by autoscan. The top navigation shows 1. Extract content and 2. Verify content.
The tag next to the module name is always visible: CORE or VARIANT for the module type, DRAFT or PUBLISHED for the state.
Field labels
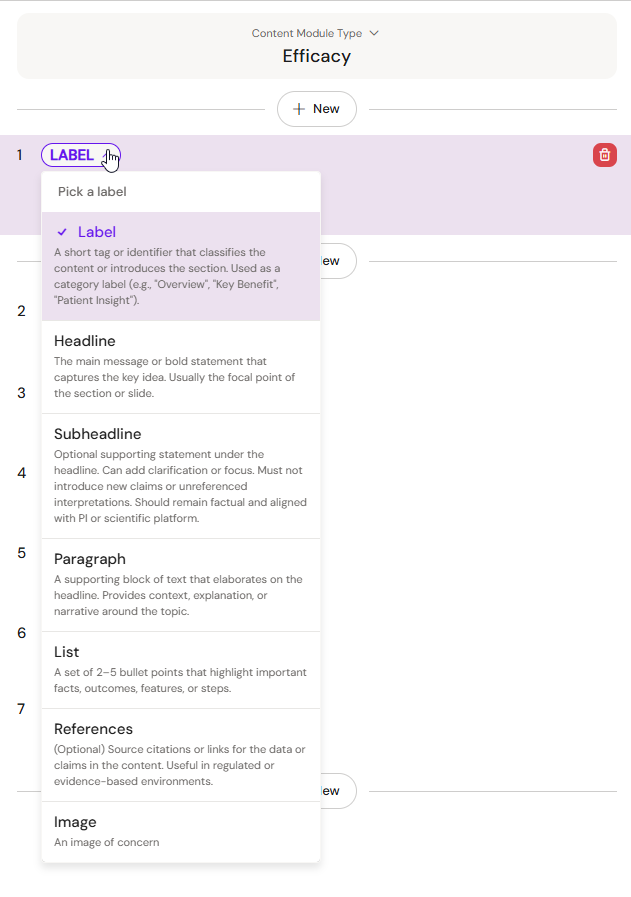
Every field carries a label describing what kind of content it holds. There are six labels available:
-
Headline for text used in the headline
-
Subheadline for subheadlines
-
Paragraph for paragraph text
-
Footnote for text used in the footnotes
-
Reference for the list of references
-
Image for extracted images
The content module type you selected at creation defines which labels are required and their default order. Required labels show a red REQUIRED chip and cannot be deleted.
To change a field's label, click the label pill (e.g. HEADLINE) and pick a different one from the dropdown. To add a field between two existing ones, click + New on the divider. Each new field defaults to Headline; use the label picker to change it.
Text formatting
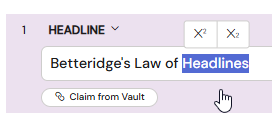
While inside a text field, highlighting a portion of text with the mouse brings up a formatting bar. From this bar, you can apply superscript or subscript to the selected text, useful for reference markers, units, or chemical notation. This is the only text formatting available, and it works across all field types (Headline, Subheadline, Paragraph, Footnote, Reference).
Linking fields to the DAM
Any text string in a field can be linked to an approved Claim in the connected DAM (Aprimo or Veeva Vault, depending on the tenant). Any Image field can be filled from a DAM asset instead of typed content or an extracted image.
Linking a Claim to a text field
With a text field selected, click Link to Claim below the field. A modal opens showing all Claims available for the module's country and product combination, sourced live from the DAM. Search or scroll to find the right one, select it, and confirm with Link 1 Claim.
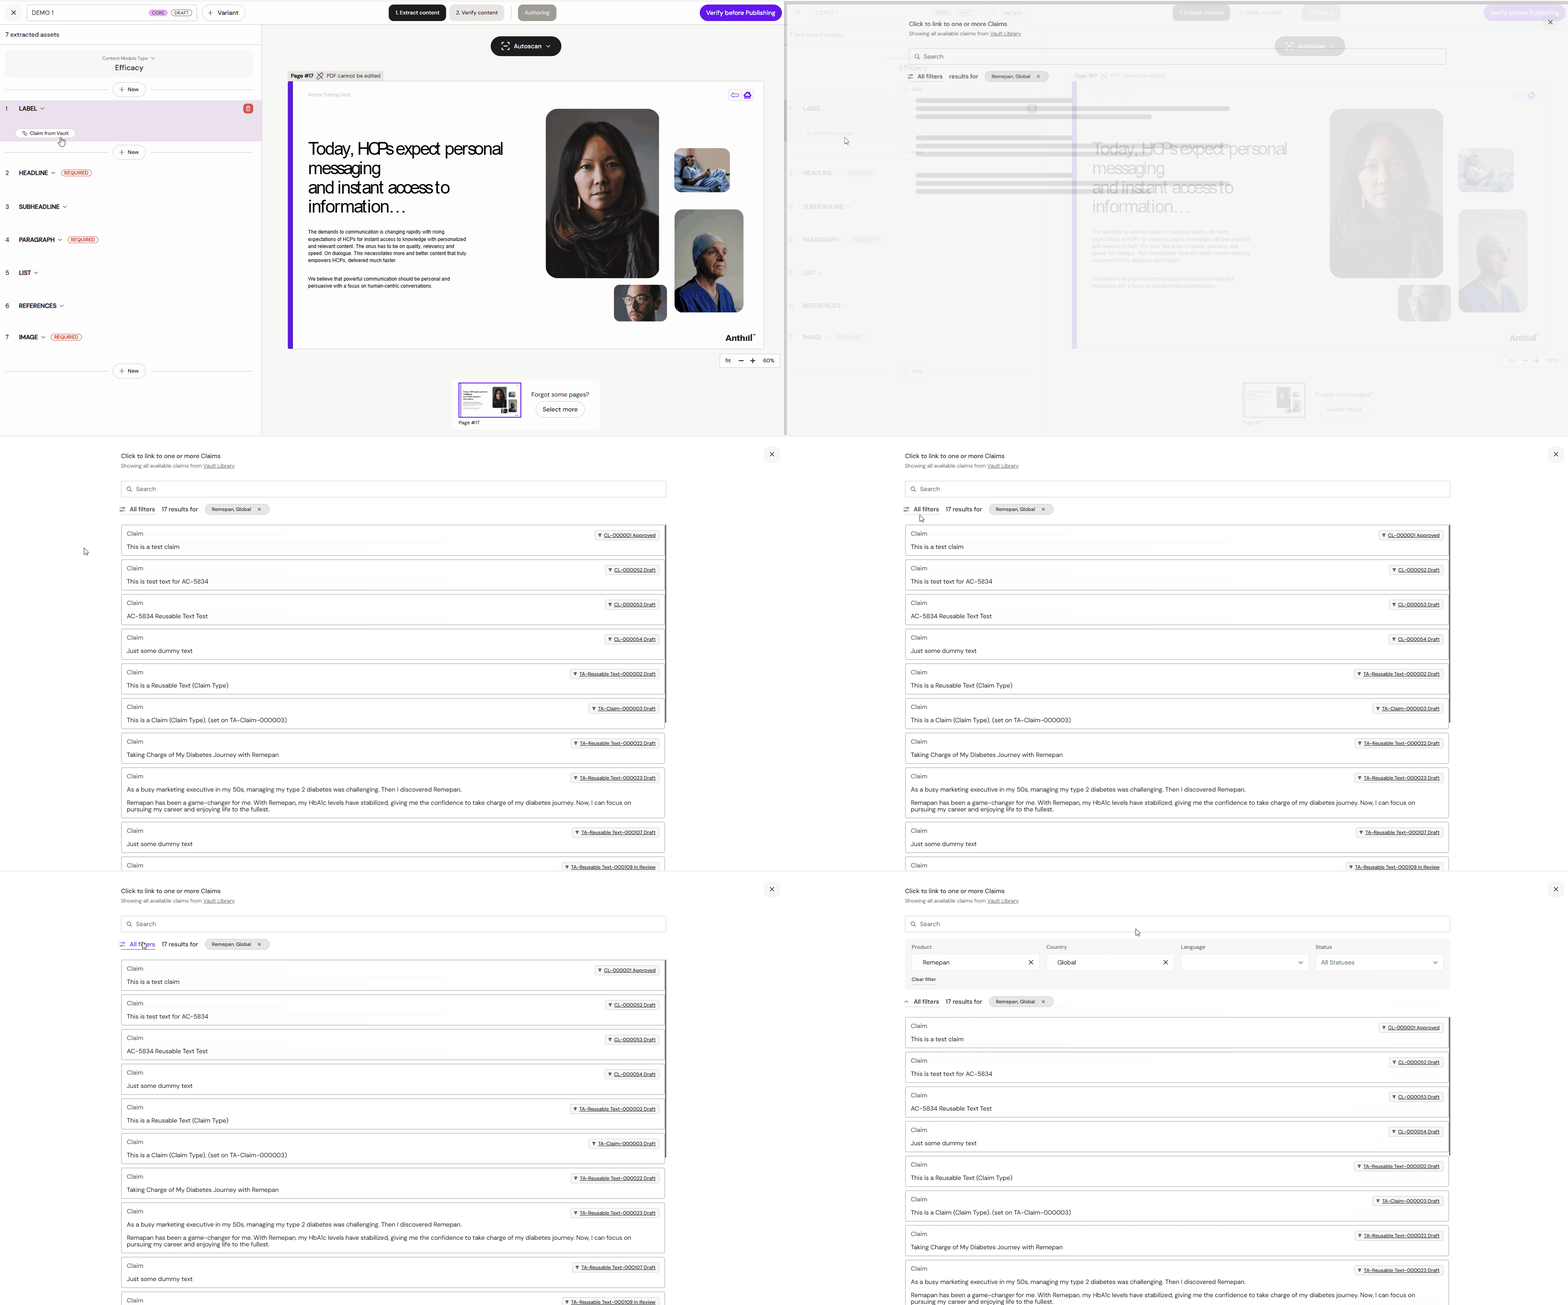
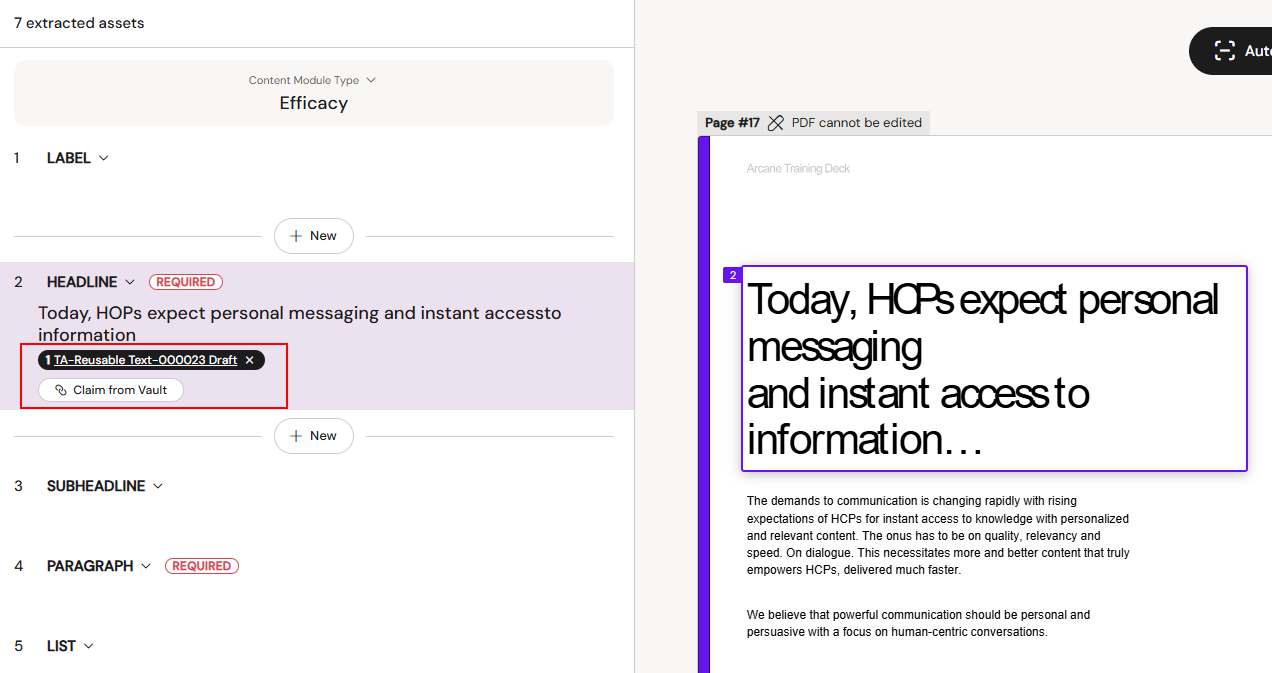
The linked Claim appears as a status chip above the field (e.g. CL-000008 Draft), and the module now carries a formal reference to that Claim through publishing. Multiple Claims can be linked to the same field. Removing a link is a single click on the chip's × icon.
Because the Claim modal is filtered by the module's metadata, authors only see Claims relevant to what they are producing. Global Claims in other markets do not surface unless the module's country field changes.
Referencing an image from the DAM
In an Image field, click Reference from Vault. A grid of image assets opens, filtered by the module's metadata, showing thumbnail, asset ID, name, version, and status (Draft, Approved, and so on). Select one and confirm with Link 1 Image Asset. The image renders inline in the field and a Change image button appears below for swapping later.
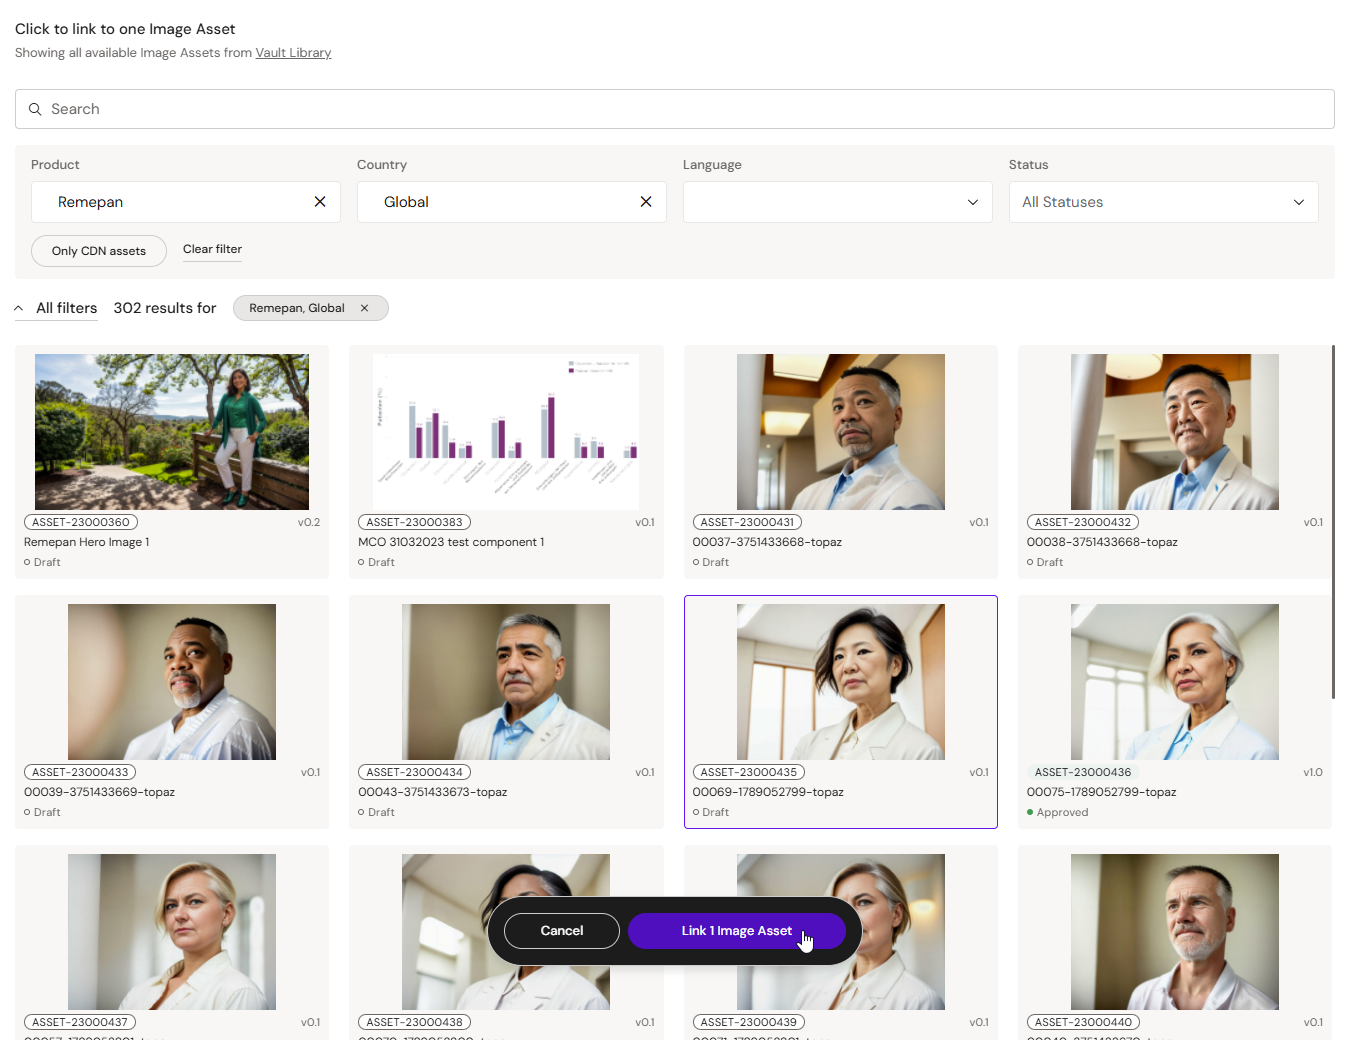
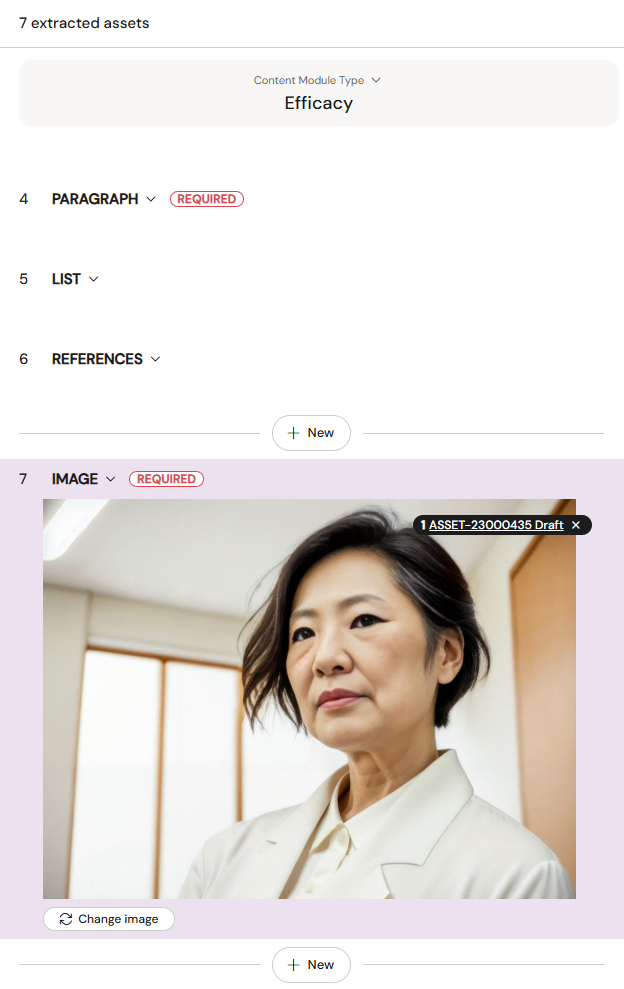
Image assets extracted from the source PDF and image assets referenced from the DAM behave the same way from publishing onwards. The distinction matters for governance: DAM-referenced assets carry an approval status and version the author can see before they choose.
Populating fields in PDF mode
In PDF mode there are three ways to move content from the PDF into the fields, all accessed from the Autoscan dropdown at the top of the PDF viewer.
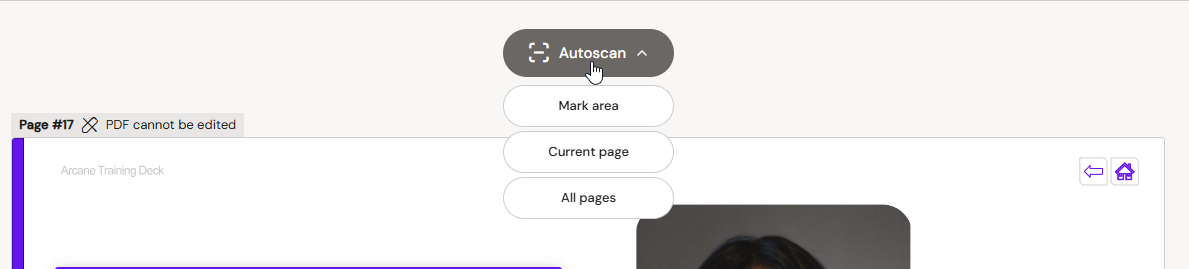
Mark area. Pick Mark area from the dropdown, then draw a rectangle around the content you want to capture. A preview chip appears with your selection and a ✓ / × for confirm or discard. On confirm, the content goes into a new field or an existing one you have selected.
Autoscan current page. Pick Current page. Every distinct asset on the visible PDF page gets extracted and added to the field list, each with an auto-assigned label based on what the AI recognises (headline, paragraph, image, and so on). Numbered markers appear on both the field list and the PDF preview, matching so you can trace each asset back to its source location.
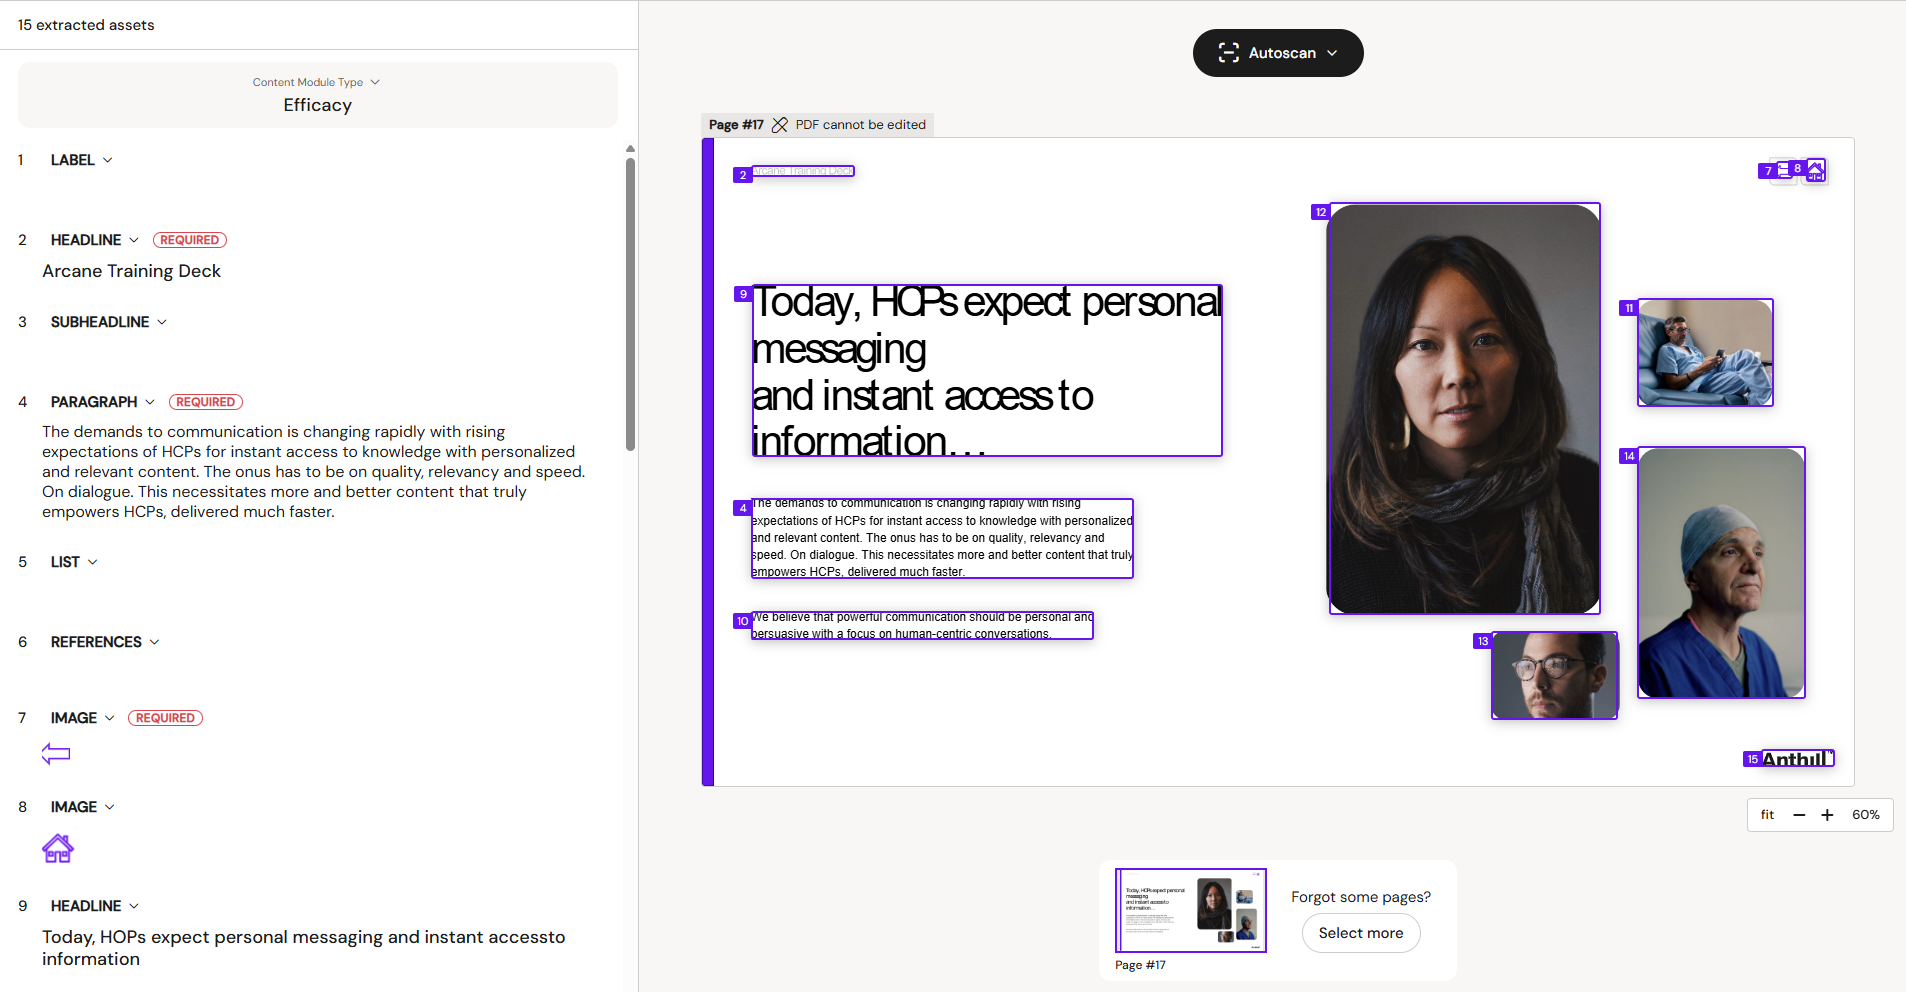
Autoscan all pages. Same as current page but runs across every page you selected during import. This is the fastest way to populate a module from a multi-page source. A two-page marketing brief typically produces 20–30 extracted assets, which you then verify and clean up in the next step.
Autoscan works reliably for Latin scripts. Non-Latin content (Cyrillic, Arabic, CJK) does not extract reliably in the current release; improvements to the underlying OCR framework are on the roadmap.
Adding and deleting fields
Adding. Click + New on any divider between fields. The new field defaults to Headline; change the label from the dropdown.
Deleting one field. Hover the field and click the red trash icon in the top-right corner.
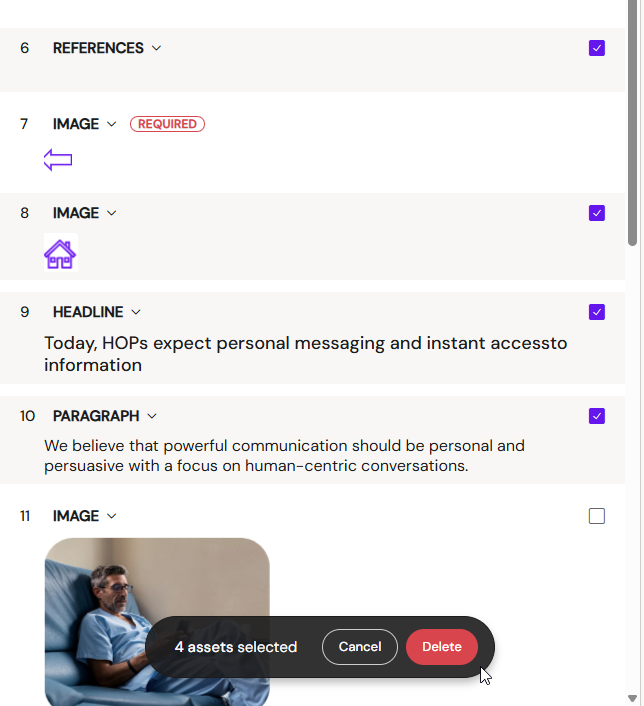
Deleting several fields. Selecting any field's row exposes a checkbox on every field. Tick the ones you want to remove and use Delete in the toolbar at the bottom of the screen. Cancel exits multi-select without removing anything. Required fields cannot be deleted.
Moving to Verify
When the canvas has all the fields the module needs and every required field has content, click Verify before Publishing in the top-right. The canvas transitions to the Verify step, where metadata and business rules are added before the module is pushed to the DAM. See the Publishing a Content Module page for what happens next.