
Publishing takes a completed content module and pushes it to the connected DAM (Aprimo or Veeva Vault) as a first-class, addressable object with its own ID. Once published, downstream systems can pull the module for MLR review, channel deployment, and lifecycle sync.
The Verify step
Before publishing, every module goes through a Verify step. Click Verify before Publishing from the authoring canvas to open the Verify view. It has three columns.
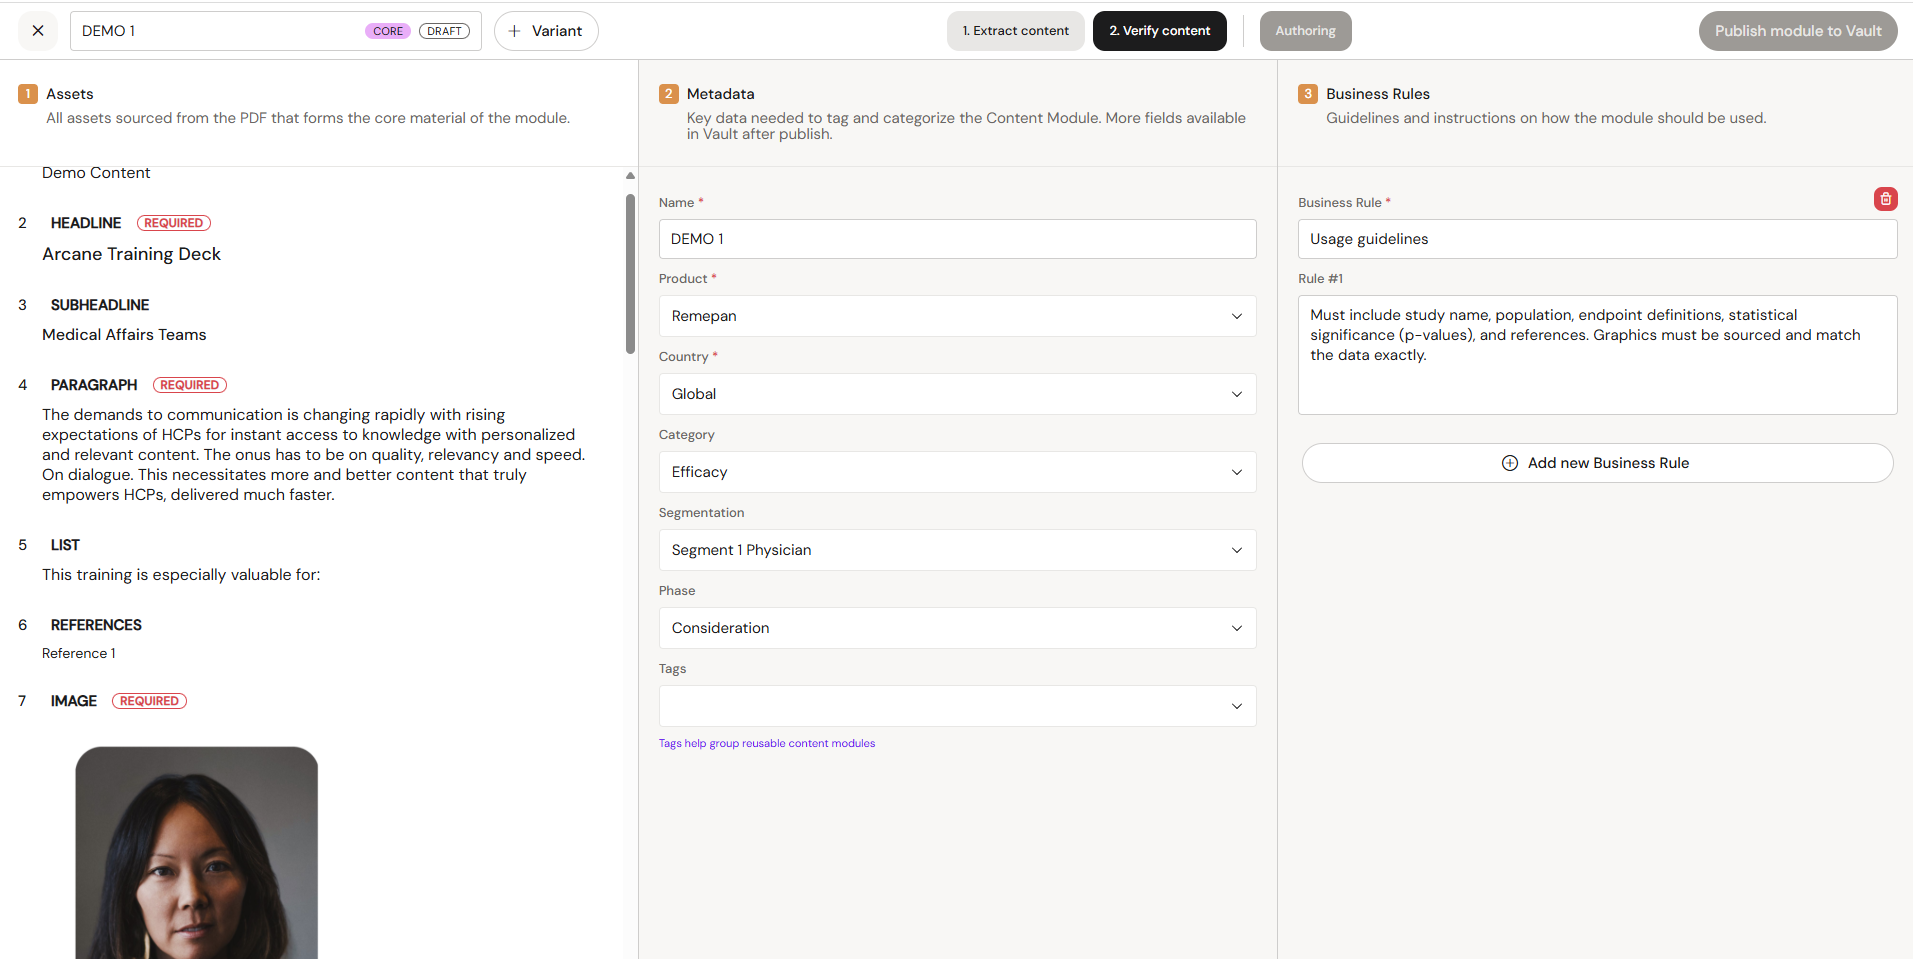
1. Assets
A read-only preview of every field on the canvas, in order. Use this column as a final check that content, labels, and Claim or image references are correct. To change anything, go back to 1. Create content (scratch mode) or 1. Extract content (PDF mode).
2. Metadata
An editable form of the module's identifying metadata:
-
Name (required)
-
Product (required)
-
Country (required)
-
Category
-
Segmentation
-
Phase
-
Tags
The values pre-fill from what you entered at creation. Changing them here changes them everywhere. More metadata fields become available in Vault after publish — the fields shown at this stage are the minimum needed for the module to be usable downstream.
3. Business Rules
Guidelines and instructions on how the module should be used. Each rule is a name plus a body of text, e.g. "Do not use with pediatric audiences" or "For DTC channels only".
Two kinds of rules can appear here:
-
Default rules from the content module type. If the type you selected at creation has default rules attached, they appear here automatically and apply to every module of that type. Some default rules require the author to fill in values before the module can publish (indicated by a warning icon).
-
Module-specific rules added by the author. Click Add new Business Rule to add one. Rules can be edited or removed with the red trash icon.
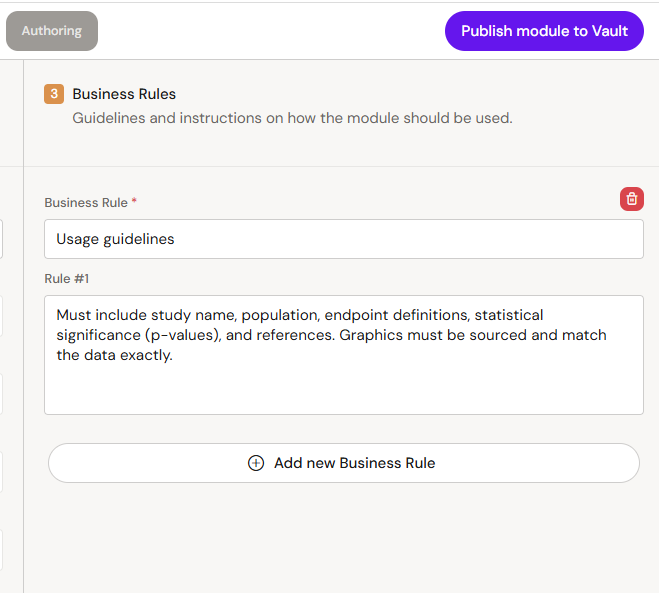
Publishing
Click Publish module to Vault (top-right) once Verify is complete. The publish operation runs the module against the DAM and returns one of three outcomes.
Success
A confirmation panel opens with:
-
The module's Vault ID (e.g. CM-000350) and a direct link into the DAM
-
Publication timestamp ("Published X minutes ago")
-
Expandable breakdown of what was pushed (see below)
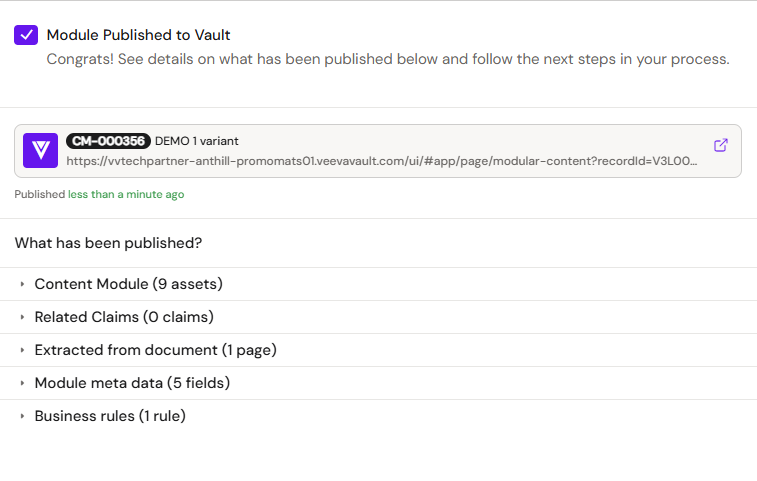
Partial success
If the module publishes but some assets or rules fail validation, the confirmation panel opens as Publishing Partially Successful. The header reads: "Your module was published, while some assets failed. Revisit your assets and try publishing again to make sure your module is complete."
The breakdown flags exactly what failed. The most common cause is a Business Rule with missing values that the DAM rejects. Fix the flagged items and click Publish module to Vault again.
-20260715-093551.png?cb=99d3813ff32380d09e84127f5626df62)
Failure
Full failure is rare and usually indicates a connection or authentication issue with the DAM rather than a content problem. The error message identifies the cause; if unclear, contact support.
What the confirmation panel shows
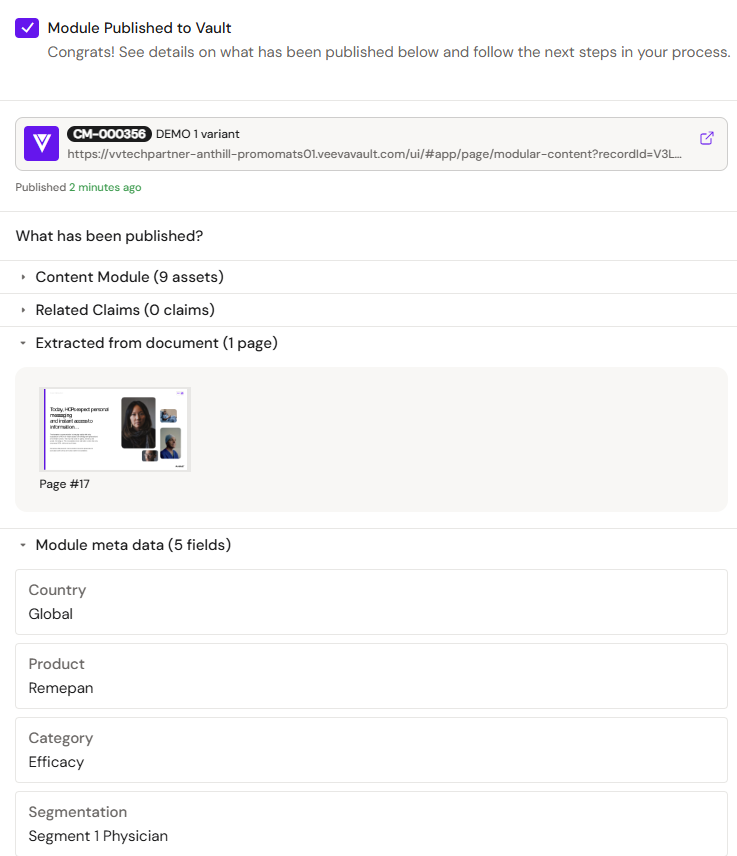
The confirmation panel is the delivery manifest for the module. Expandable sections cover:
-
Content Module (X assets). Numbered list of every field that was pushed, in the order they appear on the canvas.
-
Related Claims (X claims). Every linked Claim with its ID and status (e.g.
CL-000008 Draft). Follow the Claim link into Vault to see it in situ. -
Extracted from document (X pages). Thumbnails of every source page the module was built from.
-
Module meta data (X fields). Every metadata field with its value (Country: Germany, Product: Remepan, etc.).
-
Business rules (X/Y rules failed if applicable). Per-rule status. On partial success this section shows which rules passed and which failed, with the failure reason on each.
What happens in Vault
Once published, the content module is a first-class object in Vault with:
-
Its own ID (CM-XXXXXX)
-
Version and status tracking
-
MLR routing based on the tenant's workflow configuration
-
Downstream availability for channel deployment (email, slides, banners, and so on)
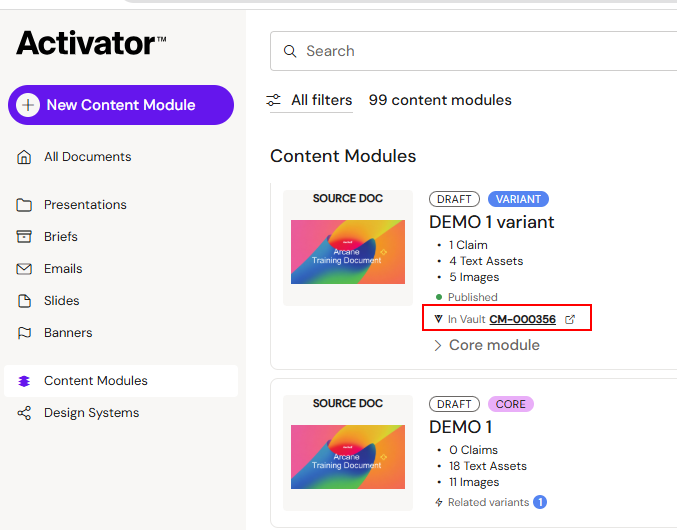
The Vault ID and link stay on the module card in the Content Modules list, so authors can jump between Activator and Vault without hunting for the object.
Editing a published module
Editing a published module creates a new draft version in Activator without affecting the currently published version in Vault. When the new draft is published, it either supersedes the existing Vault object or creates a new version depending on the type of change and the tenant's Vault configuration.
To edit, open the module and click Edit Content Module from the card menu or the module header.
Related pages
-
Module Authoring Canvas — building the module before Verify
-
Module Autoscan — populating fields from a source PDF
-
MLR Report for Content Modules — the source-file report generated when publishing to Aprimo