
A click tag is the industry-standard way for display banners to handle clicks. Instead of a hard-coded destination URL, the banner exposes a variable that holds a URL, and the ad network or publisher can override that URL at serve time with its own tracking or redirect link. The URL you enter in Activator acts as the default destination if nothing overrides it.
Click tags are available from Activator 3.8.0.
Where to find click tags
Click tags are managed in the Click tags section of the styles panel, and this section appears when a banner viewport is active.
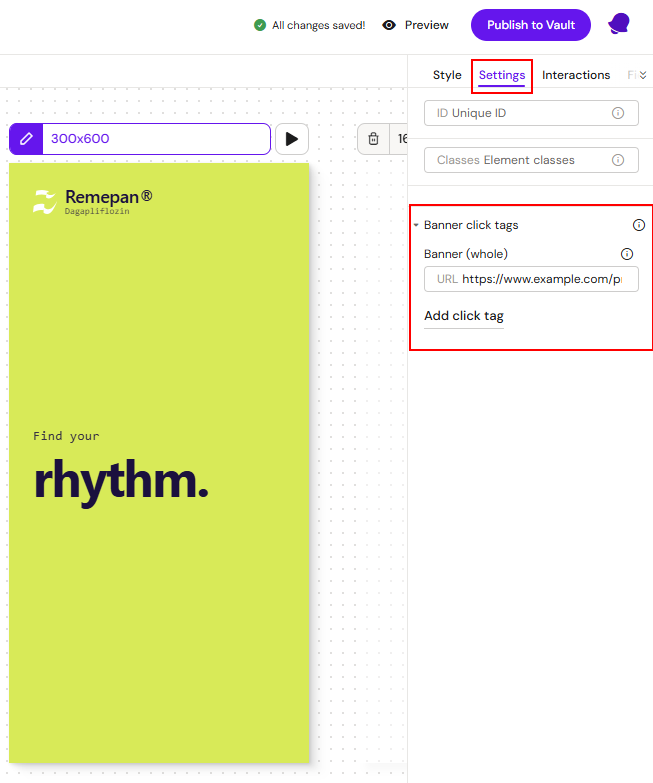
The banner-wide tag is always shown with a URL field, even before anything has been saved. Nothing is written into the banner until you fill in a field or add a tag, so you can safely open this section without changing anything.
Static vs. animated banners
On static viewports, only the banner-wide tag applies. This means the whole static banner is clickable through a single destination URL.
On animated viewports, you also get element-level attachment: you can make individual elements (such as a specific CTA button) open a different URL than the rest of the banner.
Adding a secondary click tag
If you want more than one clickable destination in a banner, add secondary click tags:
-
Click Add click tag. The new tag is automatically named the next available option, for example clickTag2, then clickTag3, and so on.
-
Fill in the URL. It must start with http:// or https://.
-
Optionally rename the tag. The name has to be a valid, unique identifier within the document, and it can't be "clickTag" since that name is reserved for the banner-wide tag.
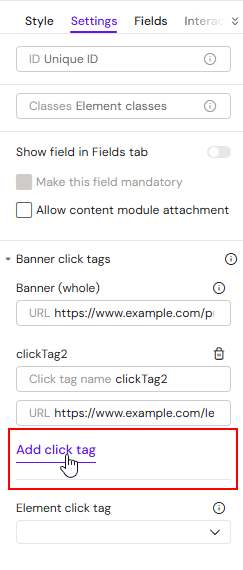
If you delete a tag, the names of the remaining tags won't change or shift. This keeps any elements already attached to those tags pointing at the right place.
Attaching a click tag to an element
Element-level attachment only works on animated viewports, and you need at least one secondary click tag defined first.
-
Select the element you want to make clickable.
-
An Element click tag dropdown appears at the bottom of the Click tags section.
-
Choose the tag you want to attach it to, or choose None to detach it.
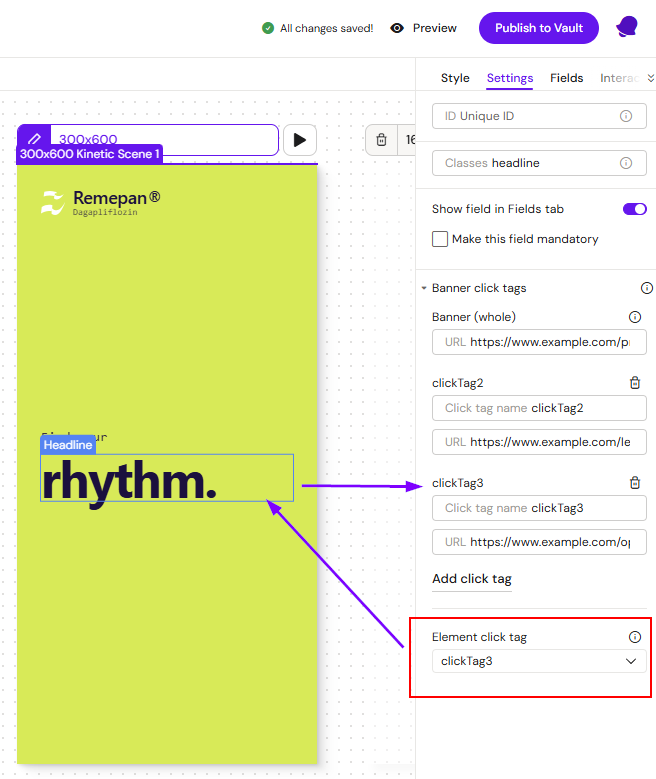
The attachment is stored on the element itself, so it survives republishing and is included in every export.
What happens when the banner runs
Inside the editor, click tags don't do anything. Clicking an element edits it, the same as it always has.
In the published banner, clicking a tagged element (or clicking anywhere on the banner, for the banner-wide tag) opens whatever URL that tag's variable currently holds. That's your default URL, unless the ad network has substituted its own.
Reviewing click tags
Every click tag you've defined, along with its destination URL, is listed in the MLR report, so reviewers can check every destination before the banner goes out. See MLR Report for Banners for more on what the report includes.
Related
-
Banners: overview of the Banners channel.
-
MLR Report for Banners: what gets included in the review document, including click tag destinations.